Standing Rigging
Image Gallery




Project Logs
July 14, 2011
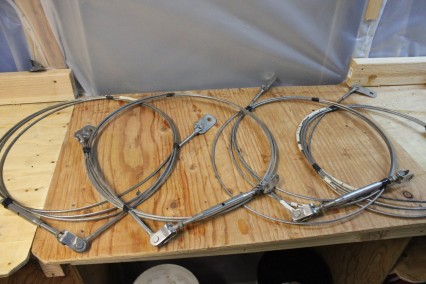
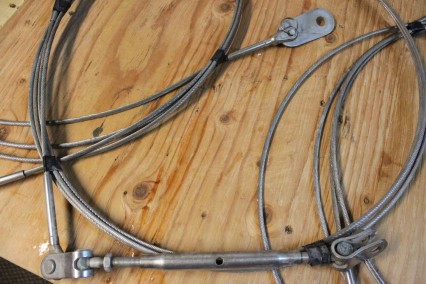
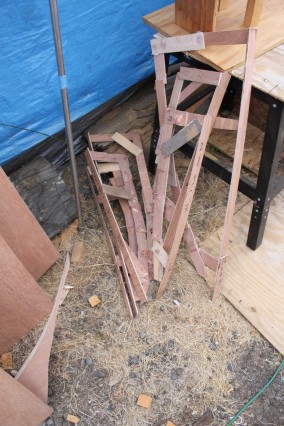
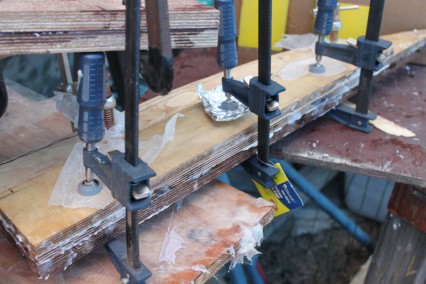
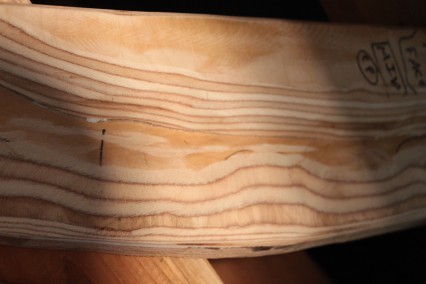
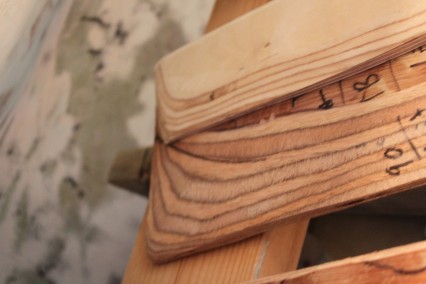
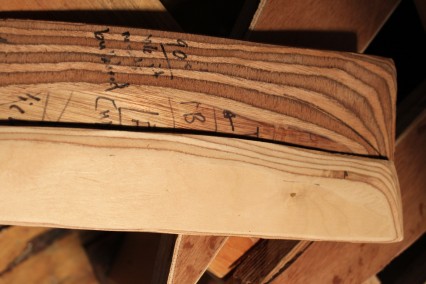
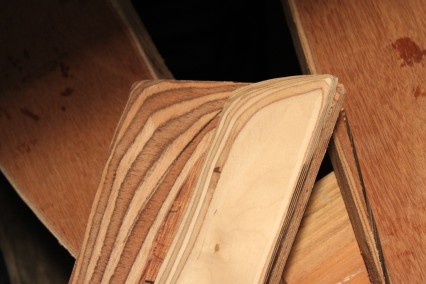
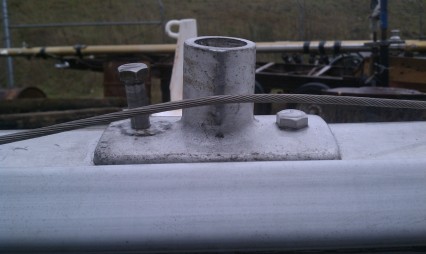
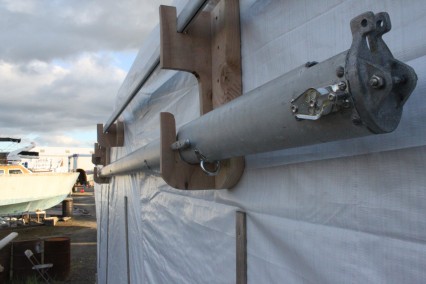
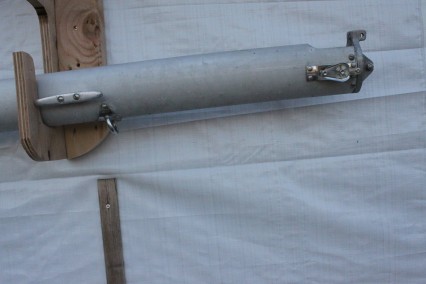
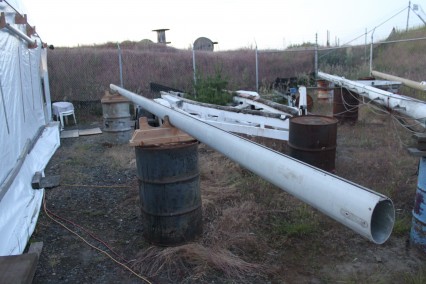
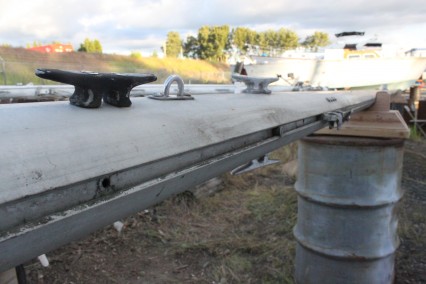
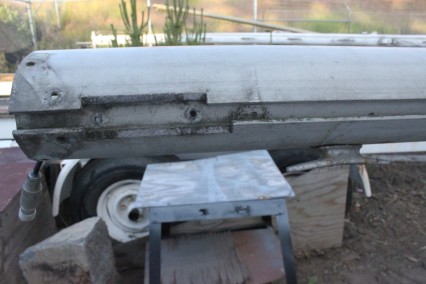
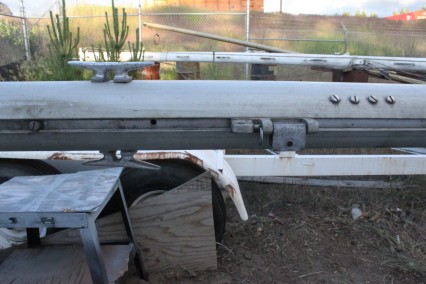
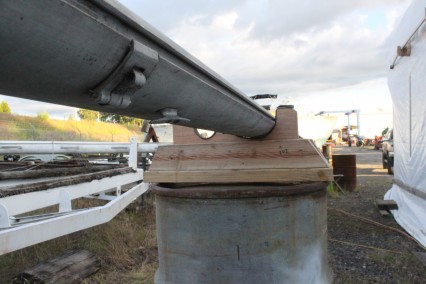
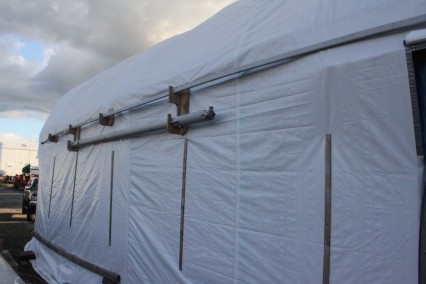
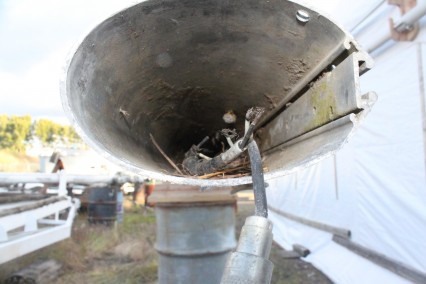
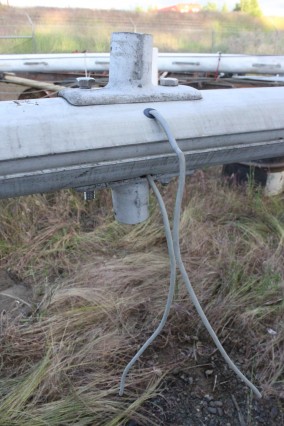
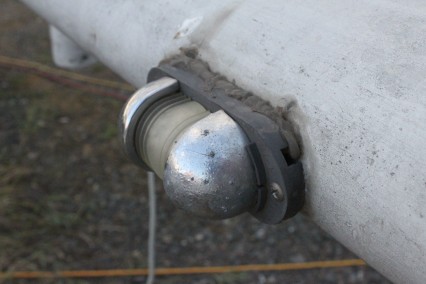
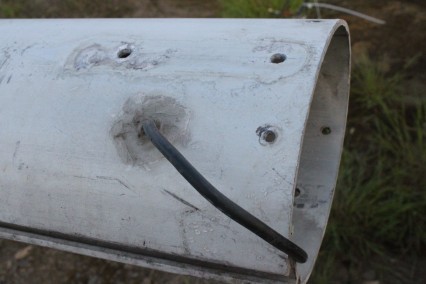
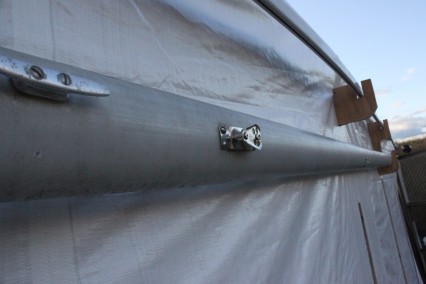
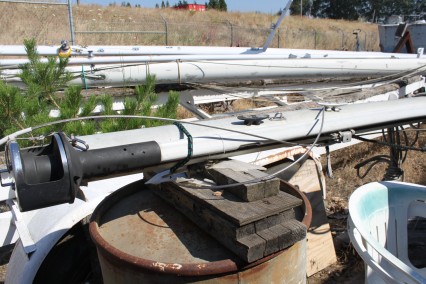
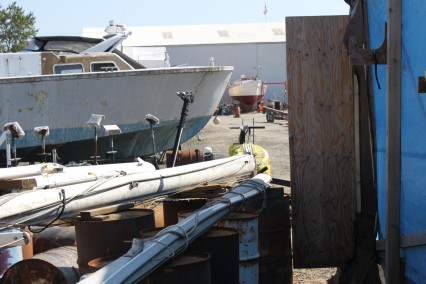
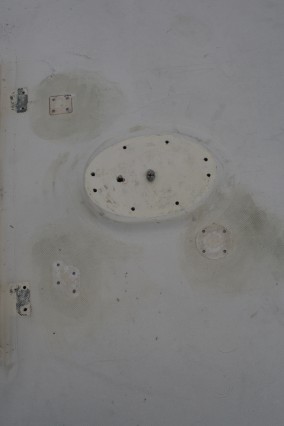
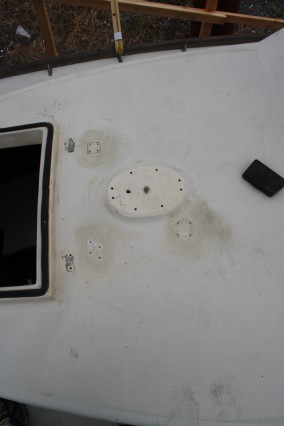
For the past two years, all the spars have been sitting outside of the boat shed awating some attention. That attention was paid to them a couple weekends ago, my Dad (Paul), who was able to strip both spars (mast & boom) of all their hardware. He also removed a considerable amount of foam that was placed in the mast to stop the wires from rattling. Considering the magnitude of this rebuild, I’ll definitely be replacing all the hardware with new, but it’s still nice to get a good catalog for what hardware was installed and to start fresh with a fully stripped down and ready for sanding work spars.
Research
- Turnbuckles, tangs and chainplates should be matched in size with the sire and terminal fittings to which they’re attached. The breaking strength of any fitting should exceed the breaking strength of the wire – up to 2-times as much for blocks and sheaves with wires pulling parallel to themselves. Check the specifications of any fitting you buy for working and ultimate tensile strength. (Upgrading the Cruising Sailboat, p. 205)
Boom
- The boom’s structure is fairly simple. With the short booms of the modern mast-head rigged boat, the end of a low boom swept across the cockpit at head height with lethal force every time the boat is tacked or jibed. Any sharp corners on the extrusion must be rounded off. A soft pad secured to the end will minimize damage to a human head... (Desirable and Undesirable Characteristics of Offshore Yachts, p. 167)
- On a boomed sail…the number of blocks and the size of the blocks and the size of the sheet will depend on the availability of winches and the size of the sail. The greater the pull, the more parts may be used. However, virtually irrespective of the size of the boat, jib sheets on non-boomed sails should be of a single part; adding a part by shackling a block or blocks into the clew creates unacceptable danger to the crew during tack and the blocks themselves will be quickly demolished as they strike the mast or babystay..
- One extremely bad practice is to fit a wire pendant between the main boom and the upper block in the mainsheet purchase…the effect is to endanger the crew with a wildly flying block at about face height whenever there is any slack in the sheet during a tack or jibe.
- One important piece of boom gear is rarely installed: a pad for the boom end. (Desirable and Undesirable Characteristics of Offshore Yachts, p. 183)
- For an image of boom end arrangement, see Desirable and Undesirable Characteristics of Offshore Yachts, p. 186
Chainplate & Tangs
- Do not bed deck trim plates with polyurethane. Bedding under the plate adds little if anything to leak prevention, and even the small amount of sealant that squeezes out the slot when you install the dry tri plate over the wet bedding for the chainplate will make later remove of the trim difficult. (This Old Boat, p. 131)
- A very worthwhile enhancement is raising the opening for the chainplate above the surface of the deck. A rise sufficient to prevent the chainplate opening from sitting under standing or flowing water limits the demands on the sealant and can dramatically reduce the occurrence of deck leaks at the chainplate. You can raise the opening by bonding a block of solid material to the deck over the chainplate slot, but the joint between block and deck is still at deck level. Better yet, grind the surface as for a fiberglass repair, then cast an island from epoxy resin thickened with colloidal silica. Use modeling clay to make the form and the resulting structure is a permanent member of the deck. The opening in the deck must continue up through whatever rise you fabricate. A cast riser will require some shaping. Bed the chainplate as before, installing the trim plate on the top of the riser. Protect exposed epoxy with paint. (This Old Boat, p. 131)
- Chain-plate loads should be spread by a hull attachment that is as long as possible – a structural bulkhead is ideal. (Desirable and Undesirable Characteristics of Offshore Yachts, p. 98)
- On a New Orleans Marine built Frers 40 ocean racer, the system works like this: The bulkhead is of ¾” plywood that is reinforced on both sides almost in its entirety with multiple layers of unidirectional roving that run well up onto the hull, and the housetop and sides. The laminates on either side are built up as thick as the hull itself. To this monolith they attach the chainplates made of ⅝” thick stainless steel, backed up on either side of the bulkhead by a similarly shaped piece of 3/16” stainless. The plates are bolted to each other through the bulkhead with ten stainless steel bolts ⅝” in diameter. (From a Bare Hull)
- When installing chainplates, the rigging plans will usually give measurements from the bow to the centerline of the center chainplate. From this point, they’ll give distances to the lower and upper ends of the two lower shroud plates. These measurements are critical for they determine whether your chainplates will line up correctly with the shrouds or not. If they don’t line up, undue strain will be put on one or two bolts. (From a Bare Hull, p. 325)
- …loads approaching or exceeding a ton can be exerted on the chainplates and structural members. The more inboard the shrouds, the more this load is increased. (Upgrading the Cruising Sailboat, p. 41)
- Chainplates installed through the side of the hull achieve a wider staying base than chainplates located on the side decks or cabin top. It is annoying when walking forward to have to step around shrounds mounted inboard. Outboard chainplate installations can get in the way too, however, if the lower shrouds are angled too low over the side decks. (Upgrading the Cruising Sailboat, p. 198)
- See stainless steel chainplate sizes from Upgrading the Cruising Sailboat, p. 205, Fig 10-19
Clevis Pins, Toggles & Turnbuckles
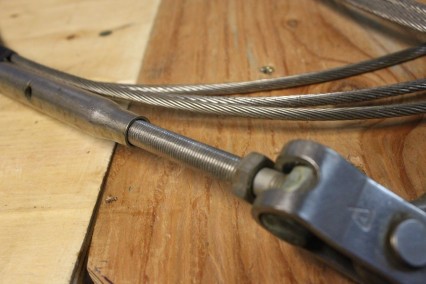
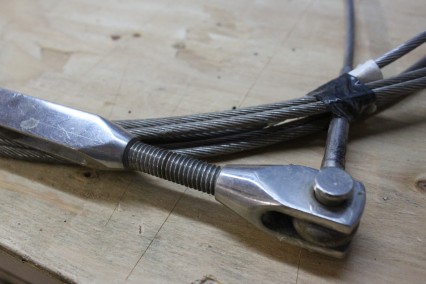
- Turnbuckles, are the normal gear for tensioning stays….They are best constructed of forged or machined bronze, which provides a good strong grip between the barrels and threads, as well as a soft surface that serves as a self lubricant to facilitate adjustmentt. (Desirable and Undesirable Characteristics of Offshore Yachts, p. 169)
- Stainless steel should be avoided because the close tolerance on threads makes the turnbuckles susceptible to “galling”, or cross-threading, which leads to freeze ups. Navtech has overcome this problem by using a bronze turnbuckle screw threaded into stainless-steel ends. Chromed bronze turnbuckles may look better, but they cost more than similar-size all bronze turnbuckles. Most important, the chroming weakens the critical thread area. If you desire chromed turnbuckles, install the next size larger than the recommended bronze fittings. (Desirable and Undesirable Characteristics of Offshore Yachts, p. 169)
- Besides bronze materials, we urge use of the open-barrel design…which allows you to see if a sufficient amount of thread had been wound up. Because there is no way to inspect the threads in closed-barrel, r tubular turnbuckles, they are most inappropriate. (Desirable and Undesirable Characteristics of Offshore Yachts, p. 169)
- See image from Desirable and Undesirable Characteristics of Offshore Yachts, p. 170
- On large turnbuckles, in place of cotter pins you can use machine screws threaded into the cotter-pin holes…some types of turnbuckles have compression lock nuts above and below the barrel. These nuts are most insecure under the inevitable tension and twising and should not be used. (Desirable and Undesirable Characteristics of Offshore Yachts, p. 172)
- Turnbuckles and clevis pins will not unscrew or pop out if you insert cotter pins or wire through barrel and end parts. A few turns through the barrel and end parts. A few turns of sailmakers tape over the barrel and sharp ends of wire and cotter pins will protect sheets from chafe, as well as turnbuckle boots. (Upgrading the Cruising Sailboat, p. 205 – 6)
- Turnbuckles (rigging screws, bottle screws) come in closed and open versions. Open turn buckles seem to be less prone to corrosion and failure. Some turnbuckles are all bronze and some are all chrome-plated bronze, but many today are stainless steel. (Cruising Handbook, p. 63)
- Galling – …when a stainless steel rigging terminal is screwed into a stainless steel turnbuckle and tensioned, there is a risk of galling (a kind of seizure fairly unique to stainless steel). The cause is usually dirt in the threads, which causes friction. Stainless steel is a very poor conductor of heat; therefore, the heat generated is not dissipated. It rapidly builds up to the point at which the surfaces of the metal break down, destroying the threads. Galling is not reversible: the turnbuckle generally has to be cut off. To avoid galling, it is advisable to use plain or chrome-plated bronze turnbuckles, or stainless steel turnbuckles with bronze thread inserts. (Cruising Handbook, p. 63)
- It is also absolutely essential that all lower ends, on deck, be fitted with toggles, which provide for angular movement to allow the terminals and turnbuckles to swing and stay aligned with the stays. Without toggles, fatigue and eventually fracture in the wire….Aloft, toggles are required only on the headstay and forestay in order to compensate for the side movement of the stay caused by the jib. (Desirable and Undesirable Characteristics of Offshore Yachts, p. 171)
- Toggles compensate for temporary misalignment, not the permanent misalignment of chain plates and stays (which should be corrected structurally). They should be as short as possible, to minimize eccentric loading and twist, and they should fit snugly on chain plates, with the help of washer or shims of necessary, so that they are centered properly for optimum load distribution. Apply a thin coating of anhydrous lanolin to the pins to keep the toggles from freezing up and becoming misaligned. (Desirable and Undesirable Characteristics of Offshore Yachts, p. 171)
- Toggles should be either forged, machined, or welded. Cast toggles have been proven unreliable. (Desirable and Undesirable Characteristics of Offshore Yachts, p. 171)
- See image from Desirable and Undesirable Characteristics of Offshore Yachts, p. 170
- In use, rigging flexes continuously. Without toggles (a kind of universal joint) to absorb the movement, flexing once again leads to work hardening and failure. (Cruising Handbook, p. 62)
Cotter Pins
- Regardless of which type of standing rigging you use, be sure that each end is drilled out for cotter pins; the hole will also help you determine how much thread has been wound up. (Desirable and Undesirable Characteristics of Offshore Yachts, p. 171)
- See image from p. 17o of Desirable and Undesirable Characteristics of Offshore Yachts
- Cotter pins remain the best all-around fitting for securing all parts of the standing rigging. The only reason many people dislike them is that they don’t know how to rig them properly and they fail. Here’s the right way [see image] (Desirable and Undesirable Characteristics of Offshore Yachts, p. 171)
- Cotter rings have become popular…if you have a cotter ring, immediately replace it with a cotter pin…rings will distort easily and fall out when subjected to chafing, and…they are impossible to remove or install when the boat is pitching or rolling a seaway (Desirable and Undesirable Characteristics of Offshore Yachts, p. 172)
- Before you install any cotter pin, round the ends with a file. After the cotter pin is in place, spread the legs about 20 degrees. Unless the pin represents a genuine risk to a sail, do not tape it. Taping encourages corrosion. (This Old Boat, p. 136)
- Best way to pad the points of cotter-pin legs or other small, sharp objects is to apply a gob of silicone sealant. (Desirable and Undesirable Characteristics of Offshore Yachts, p. 174)
Downwind & Reaching Poles
- …a spinnaker pole is anodized or painted aluminum tube with cast or forged end fittings that are attached with screws (not welds). The end fittings should be same diameter as the tuber; otherwise, the tube may require tapering, which will reudce the pole’s strength. (Desirable and Undesirable Characteristics of Offshore Yachts, p. 168)
- Reaching struts (also called “jockey poles”) were developed to reduce the tensions on the spinnaker after guy when the boat is close reaching under spinnaker. The inboard end of the strut is attached to a padeye on the side of the mast. The strut stands out athwartships so that its outboard end, holds the after guy out so that the angle between the guy and the pole is increased. (Desirable and Undesirable Characteristics of Offshore Yachts, p. 168)
- Provide chafing material (leather works well) on spinnaker poles and reaching struts where they might make contact with standing rigging. (Desirable and Undesirable Characteristics of Offshore Yachts, p. 168)
- Despite the development of poleless cruising spinnakers, many cruising crews will want to carry traditional spinnakers when running in light and moderate winds. Unfortunately, large masthead spinnakers and their long poles can be hard to handle. Some interesting spinnaker stowage systems have appeared. called by several names – snuffer, squeezers, sleeves, etc. – they work by pulling a large sock up and down ove the spinnaker to set and douse it. This means that the sail is well under control when it is hoisted and lowered. Obviously, this is a great advantage and can be recommended for shorthanded sailing. Another labor saving device is to stow the spinnaker pole vertically on the mast track, pulling the inboard end far up the mast when the pole is not in use. The only disadvantages of this system are weight and windage aloft. (Desirable and Undesirable Characteristics of Offshore Yachts, p. 200)
- If your boat does not have a special retrieving system, you can make dousing easier if you always rig two sheets on each clew – one led aft for use as the sheet, and the other led fairly far forward (to the rail at approximately the point of widest beam) for use either as the after guy or as the sheet when dousing the sail, since it pulls the sail safely into the lee of the mainsail. (Desirable and Undesirable Characteristics of Offshore Yachts, p. 200)
- If you intend to use any large head sails you will need to have a reaching pole to help your sail set...the fitting to be used on the inboard end, however, should be of only he bayonet type with no compromise. The snap hook fitting is the more commonly used on small boats and it is indeed fine for weekend cruising where longevity can be bypassed. (Desirable and Undesirable Characteristics of Offshore Yachts)
- Cruising boats should have at least one downwind (whisker) or spinnaker pole ( the difference between the two is primarily length and strength: spinnaker poles are longer and are expected to take higher loads, and so are built heavier and stronger)….A pole should be of such a length that when mounted to the mast and pulled back against the shroud, the outboard end lines up with the clew (the attachment points for the sheets) of the fully extended genoa (which generally means the pole is about 100% of the distance from the base of the mast to the base of the forestay). Even better than one pole is two poles mounted to the mast. When sailing downwind, the roller reefing genoa is set on one pole and another jib or genoa is set on the other. (Cruising Handbook, p. 57)
- The pole is most conveniently mounted on a track on the face of the mast in such a way that when fully raised, its outboard edge can be clipped to either the lifelines or a fitting at the base of the mast. The drawbacks to this arrangement are that it puts the weight relatively high, creates windage, and – in a worst case scenario – if the mast goes overboard, the pole (a potential jury-rigged mast) goes with it. (Cruising Handbook, p. 57)
- …the pole can be stowed in chocks on deck, but it almost always a toe stubber. If stowed on deck, it should be positioned well forward so that the rear end simply has to be lifted up to clip it to the mast fitting, instead of maneuvering the entire pole into position. (Remember that this work may have to be done when the boat is rolling vigorously downwind; the less the pole has to be moved around, the better.) The light weight of carbon fiber makes it an ideal material for downwind poles, albiet at a price… (Cruising Handbook, p. 58)
Fasteners
- See ‘Fasteners‘ project page.
Lubrication
- …if the system has movement, you must lubricate it often. However, one piece of gear that must never be lubricated is the set of brake bands used to keep a reel halyard winch from backing off. (Desirable and Undesirable Characteristics of Offshore Yachts, p. 173)
- Best permanent-type lubricant for turnbuckles, clevis pins and many other items is anhyrous lanolin…tthick grease that is available in small tins from most drugstores. Apply it with your fingers or a tongue depressor. (Desirable and Undesirable Characteristics of Offshore Yachts, p. 173)
- Adequate supply of rigging tape…industrial tapes…certainly seem to be adequate or all jobs at a fraction of the cost. (Desirable and Undesirable Characteristics of Offshore Yachts, p. 173 -4)
- The threads of all the turnbuckles should be well lubricated. Old salts around the world recommend anhydrous lanolin for this purpose. More modern salts use Teflon grease. Make sure the turnbuckles are turn the same way, preferably with the right-hand threads downward. Also, lubricate the toggles so they can do what they were designed to do. In fact, you should also lubricate all the clevis pins. (This Old Boat, p. 136)
- Lubricate turnbuckles with anhydrous lanolin at least annually…it’s a good policy to lubricate all rigging pins with lanolin to facilitate extracting them in case of emergency. (Desirable and Undesirable Characteristics of Offshore Yachts, p. 170)
Mast Step
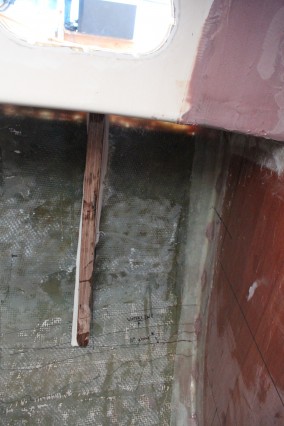
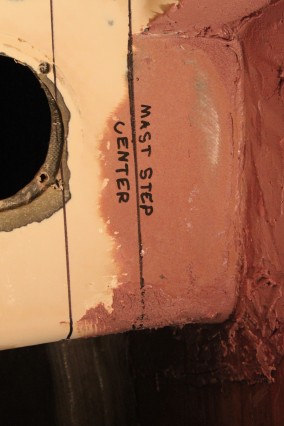
- Most small and medium-sized aluminum masts are stepped on deck requiring a footing or mast step. The rims of the step should be quite high (3/4” is not too drastic) to keep the mast in step if it has a tendency to jump about in it’s place. If the cabin top is well reinforced with the compression taken care of this motion should never occur. (From a Bare Hull, p. 362)
- Through the rim should be drilled at least two drain holes to allow any water that has found its way into the mast through the sheaves, rivet holes, etc. to drain off. Salty water will corrode anodized aluminum if the metal is closed off so it cannot air. To prevent interior corrosion whether your mast is a tabernacle or not, it’s a good idea to coat the lower 3 feet of the extrusions interior with either primer paint or a thin layer of heavy grease. Either will protect the mast and extend its life. (From a Bare Hull, p. 362)
- Bulkheads and vertical floors are the best way to distribute the stresses from ballast weight and mast compression. The mast step must distribute mast compression fore and aft to floors A bulkhead close to the mast is a desirable feature. (Desirable and Undesirable Characteristics of Offshore Yachts)
- With a deck-stepped mast, if a shroud that terminates on deck breaks or is disconnected the whole mast will topple over. A proper seagoing yacht must have her mast stepped through the deck onto a well-engineered mast step that is structurally supported by the keel. (Desirable and Undesirable Characteristics of Offshore Yachts, p. 167)
- A good neoprene mast boot…one of the best developments in yacht construction, a mast boot is a length of inner tubing that is secured tightly onto the mast and deck with a mechanical device – usually a hose clamp to seal off the gap between the mast and partners. The rubber will deteriorate in the sun unless it is shielded with a canvas or Dacron outer boot. (Desirable and Undesirable Characteristics of Offshore Yachts, p. 167)
- An alternative [to mast pulpits] is to thru-bolt foot chalks at strategic spots around the mast to give better footing. A wedge-shaped length of teak cut two inches high will do the job. (Upgrading the Cruising Sailboat, p. 166)
- For the ultimate in strength, the ocean cruising boat should have a keel-stepped mast, because if a shroud or stay lets go, the deck helps to support the mast, hopefully long enough to bring the boat about to another tack and ease the load. In the same situation, the deck stepped mast is already gone. [However] a deck-stepped mast is more likely to come down in one piece (if the cause is broken rigging) and less likely to cause damage tot he deck. (Upgrading the Cruising Sailboat, p. 196)
- …a keel stepped mast can be somewhat lighter than a deck-stepped mast. The keel-stepped mast is also more capable of withstanding the failure of a piece of standing rigging. The deck-stepped mast, however, does not obstruct the accommodation spaces, and there is no big hole in the deck through which water can leak (a common problem). (Cruising Handbook, p. 58)
- …determining the appropriate extrusion for any boat is a matter for engineers, not the boat owner. (Cruising Handbook, p. 58)
Rig Type
- The choice in a single-masted, mainsail and jib rigs lies between the sloop and the cutter. There has always been confusion as to their definitions…when we say “sloop” we mean a single-masted sailing yacht with only one stay (the headstay for a single jib. By “cutter” we mean a yacht that can carry two jibs. One jib is set on the headstay, which runs to the stem, and the other is set on a forestay (often called an inner forestay), which runs to the foredeck. The advantage of the sloop is simplicity, with only two sails – a mainsail and a genoa job – and a little standing and running rigging to go wrong. The advantage of the cutter is flexibility and ease of handing – mainsail and two relatively small headsails, a forestaysail and an outer jib. (Desirable and Undesirable Characteristics of Offshore Yachts, p. 161)
- The decision to radically alter a boat’s designed rig should be based on dissatisfaction with specific aspects of the boat’s performance, not some general sense that a different rig is better And you need a high degree of confidence that the new rig will correct the performance problems without introducing new ones. This suggests a level of experience that most casual sailors never reach. (This Old Boat, p. 112 – 13)
- Why do you want double headsails? They can allow the headsails to be smaller and correspondingly easier to handle. They do provide sail combination possibilities that are not available with a single headsail. And the staysail is regarded as an outstanding heavy weather sail that’s easier on boat and crew alike. But a sail suitable for heavy conditions can not be set on a casually rigged way. Additional sail combination possibilities do not necessarily translate into better performance. And if handling headsail is difficult, better furling gear and more powerful winches will likely be a less expensive option than adding an inner stay, installing inboard tracks, mounting a second pair of sheet winches, buying a new sail, and having the existing sail or sails appropriately recut. (This Old Boat, p. 131)
- See images from Desirable and Undesirable Characteristics of Offshore Yachts, p. 163 – 4
Rig Type – Cutter
- The rig that we favor for the offshore cruising is the double-headsail cutter. Not only are its two relatively small headsails lighter and easier to handle than one large genoa jib, but with the cutter’s high-cut jib topsail there is no big, low-cut sail draped to leeward, threatening to scoop up the bow wave and block the crew’s view to leeward. Another advantage of a high-cut headsail is that it can be easily swung out on a spinnaker pole when running before wind…a problem with the double-headsail rig is that when the boat is being tacked the jib top risks being torn by sail hanks as it sweeps across the luff of the staysail. To protect the sail…sew a protective patch over each staysail hank. These patches fit tightly when the staysail halyard and luff are tight but when the halyard is eased they can be opened. (Desirable and Undesirable Characteristics of Offshore Yachts, p. 198)
- For cruising under the cutter rig, we recommend a small, versatile sail inventory: a proper mainsail, a large light jib topsail, a small heavy jib topsail a forestaysail, a storm trysail, and a storm staysail. With this inventory you can handle just about every condition. For light winds, a large light Dacron reacher-drifter jib will be a good addition. On smaller vessels with ample crew power, a poleless nylon cruising spinnaker – set like a genoa except that it is not hanked to the headstay – can be added to complete the inventory. (Desirable and Undesirable Characteristics of Offshore Yachts, p. 198)
Rig Type – Sloop
- The inventory for a single-headsail sloop will be smaller than that on a cutter, because there is no provision for a staysail. The largest jib might be about the size of an IOR #2 genoa, but with a higher clew and a shorter luff (to keep the foot out of the water and facilitate lifting the tack in rough weather). If there is a cringle in the leach about 7’ about deck, the sail can be reefed to about the size of a #3 jib simply by moving the jib sheet. When the genoa is reefed, lead the sheet way aft, and lift the tack slightly on a pendant. Tie up the foot of the sail, but be alert to foul ups when changing tacks. to complete the sloops inventory, carry a # 3 jib (perhaps reefable as well) and a small working jib, plus of course storm sails….If you carry a lowcut genoa jib, make sure there is some way to pull the foot out of the bow wave when reaching…install strongly reinforced grommet about ⅓ of the way after of the tack. When spray begins to fly into the sail when you’re reaching, hook the spinnaker topping lift or an unused halyard into the grommet and pull the foot up. Or raise the sail above the deck with a tack pendant equal to at least 5% of the luff length. (Desirable and Undesirable Characteristics of Offshore Yachts, p. 198)
- …all the rigs we have discussed offer a choice between fractional and masthead arrangements for the headstay and jib halyard. In the masthead rig, the headstay runs from the stem all the way to the top of the mast. In the fractional rig, the headstay runs partway up – about 84% of the mast height is a good compromise…the mast head rig was by far the most popular. This has been because, of the two, it is the least complicated, not requiring running backstays (since the permanent backstay counters the headstay.) A more significant reason for its popularity that has been the rating rules for racing have tended to encourage large jibs and small mainsails… (Desirable and Undesirable Characteristics of Offshore Yachts, p. 161)
- fractional rig is making a comeback…there are several good reasons for carrying it: Ease of rigging – the largest and most powerful sail is the mainsail, not the jib. Therefore, the sails that must be put on and taken off – the jibs -a re much smaller and easier to handle and stow on the fractional-rigged yacht. Ease of handing – when shortening sail, you usually depower the largest sail first, and it is easier to reef the mainsail than to change headsails. Smaller spinnakers – besides smaller jibs, the fractional rig also carries smaller spinnakers than the masthead rig because the hoist is lower. Spinnakers that are relatively low on the mast are easier to control in fresh winds that larger spinnakers set from the masthead. Lower cost – since fewer headsail changes are required, the boat can have a smaller inventory of jibs. The primary disadvantage is that, running backstays must be rigged to keep the headstay relatively straight and the mast in column (not bending in its middle section, which can lead to dismasting). (Desirable and Undesirable Characteristics of Offshore Yachts, p. 163 – 4)
Rig Type – Scutter
- …Soubrette with her new bowsprit masthead rig….this is not truly a cutter rig but what Island Packet now refers to as a scutter rig. The small job rigged on the original 7/8 rig is not used simultaneously with the masthead bowsprit sail. As explained in the Cruising World letter, the masthead rig is for light air only….I expect the first question for many Triton owners will be “how does Soubrette balance with this new bowsprit masthead rig?” The answer is, beautifully. Naturally there is not much helm in light air, 10 knots plus or minus, but notwithstanding the size of the jib and the bowsprit Soubrette still shows a very slight weather helm around 10 knots. Under 10 knots with the boat sailing nearly straight up, the helm is neutral. At no time have I been able to discern a lee helm. (http://www.oocities.org/tritonassociation/soubrette/)
- With wind 10 knots or more, except off the wind, Soubrette is sailed as a sloop with a club-footed jib. This rig -is the last stage in the evolution to ultimate convenience and safety as a single hander.In heavy weather, the club-footed jib on the traveler and a reefed main provides the ultimate rig for heavy weather, a favorite of mine and one in which the Triton shines.In lighter weather, under 10 knots, I found we needed more sail and have been delighted with the new masthead bowsprit jib. This rig takes Soubrette to weather in light air, particularly if there is any slop, much better than her former #2 or #1 Genoa. You can see from the 8×10 enclosed photograph what a lovely curve this new jib takes underneath the main.There are other improvements as part of the single-handed rig. All lines and halyards come aft to cockpit. Both headsails are roller reefed. The club-footed jib uses the same line to roll the jib and haul the clew out to the end of the jib boom. As the clew is pulled out the end of the jib boom, it creates a slack which feeds forward around the drum in an endless loop….the varnished mahogany cabin windows, bowsprit and mahogany stern letters have complimented the Triton’s exceptionally good classical looks. I seldom pass another boat under sail without drawing a comment. (http://www.oocities.org/tritonassociation/soubrette/)
- We sailed with the so-called “Scutter” configuration on KiKi, which features a roller-furled 80% yankee flown off a headstay tacked at the end of the boat’s bow platform, and a roller-furled lapping genoa flown off a second headstay tacked just aft at the stemhead. The idea behind the Scutter rig is simple if unorthodox, and it points to Schulz’s open thinking with regard to manageable offshore sailing. You sail with the main and genoa in light to medium air when you need the drive, reduce the jib and reef as the wind rises, then furl it completely in brisk or heavy going and deploy the working canvas forward. What this does is keep the bow down in windy conditions by moving the center of effort forward, thereby avoiding the tendency to round up. In really wild weather you can furl everything and sail bare-headed or energize a convertible staysail stay at mid-deck and hoist a hank-on spitfire jib. (http://www.bwsailing.com/Boat_Reviews/Archives/BWS_ShannonPilot43_February2002.html)
- The Shannon Scutter rig offers a variation on the cutter/double headsail ketch theme. In 1994 Walt Schulz developed the Scutter (short for sloop/cutter to reflect the combination of the fore triangle plan of a double headsail sloop and the mainsail of a cutter) as an alternative rig for all Shannon models. On a conventional sloop, a 140% genoa cannot be reefed down with a roller furler to much less than 110% and still power the boat. A rolled up genoa loses its shape compromising its structural integrity, and consequently has no efficiency when reduced more than 30%. Roller furling a large genoa is no substitute for a true working jib in heavy winds. A single headstay boat requires a headsail change when winds increase creating dangerous foredeck work at the worst time. By contrast, the Scutter rig keeps the boat sailing well in a wide range of wind speeds, without putting the crew in harm’s way making sail changes. The Scutter headsail arrangement has a conventional roller furling 120% to 150% genoa positioned at the stemhead, and four feet forward of that on the bow platform is another stay that accepts a working jib also on a roller furler. In less than 20 knots of wind, the boat is sailed just like a sloop, with main and full genoa. As the wind picks up, the genoa is rolled in 33% to a predetermined and reinforced position. With more wind, the genoa is fully furled and the working jib is rolled out. The jib can also be reduced by 33%. Also, if wind conditions dictate, there is a third removable stay that is attached on the foredeck for a storm jib in extreme conditions. Another feature of the Scutter rig is that the center of effort on the headsails moves forward as the sails are furled, which will reduce the weather helm typically encountered on other boats in the higher wind ranges. The Scutter rig also incorporates a mast head crane resulting in the relocation of the back stays further aft. This allows for 15% more roach in the fully battened mainsail, enabling the Scutter to sail to windward reasonably well without the use of headsails. By eliminating the dependency on large overlapping genoas the Scutter rig requires much less winch work sailing to windward than a sloop. The features of the Scutter can be combined with the addition of a fully battened mizzen for a Sketch rig, with endless possibilities for the cruising sailor. (http://www.shannonyachts.com/Sails.html)
- cutter Rig with a roller Genoa on the headstay and a working jib yankee on the jibstay (roller or hanked). The Scutter Rig allows the Genoa to tack easily, but airflow is disturbed by the working jib. The working jib may not need to be rolled to tack through the slot between the stays. (The Scutter Rig is championed by Shannon Yachts). One of the features of a Scutter Rig is that the CE moves down and forward as sail area is reduced. Moving the CE forward should reduce weather helm. On a Solent Rig and traditional cutters the CE move down and aft, adding to weather helm when sail is shortened….”The most important issue for long distance sailing is that one person must be able to sail the boat without assistance in all wind and sea conditions.” — Walt Schulz (Shannon)….If you are off – shore, on watch by yourself – who is on look out, or at the helm, while your head is down ? Fighting with various sails and jammed equipement….I rather like the look of the Scutter, the fact that the working jib is positioned relatively close to the genoa (relative to traditional cutters) means that the change in handling should not be too severe. The other disadvantage that I see is that with roller furling, the (admittedly short) bowsprit will be permanently out, no retractable bowsprit would be practicle I believe. A lot of windage, and added length….Amongst experienced sailors you will find a different opinion from each person aboard one boat, so consensus is hard to reach.Good furlers are reliable.I would opt for a “working” Genoa on a furler on the bowsprit and a hank on Yankee and a hank-on storm jib on the stem-head stay, then a generous MPS with a tape luff and no hanks. If you want to keep your demountables to the smaller lighter sails then the yankee can live in a well attached deck bag lashed to the rail. You may find the yankee is only used as a “light” storm jib anyway.I’ve used Profurl a lot without problems. I find a high cut on the furler is better, also the sheets can wrap from the furled clew position down and you can get a nice tight bundle this way when snugging down for a real blow.It is surprising just how much you can achieve sail balance in heavy going by unfurling a very small amount of the genoa to assist the storm jib and this is very useful at times.A furling drum should have it’s own dedicated winch.A masthead inner forestay works if the inner terminates close to the true mast top while the outer stay terminates at the end of a the crane, then you get enough separation to stop fouling and the mast will not flex. (http://www.boatdesign.net/forums/sailboats/seaworthy-headsail-combinations-16539.htm )
- The Shannon Scutter and Sketch rigs were developed by Walt 1995 as an evolutionary milestone in his quest to perfect short-handed sailing. The Scutter rig became a reality because of the recent improvement in the dependability of roller furling gear. Be aware that in spite of all the hype and the claims, a large (135%-150%) genoa cannot be reefed down to make a safe working jib. A genoa can only be successfully reefed by 30% before the sail loses shape and becomes worthless with no drive into the wind. A conventional sloop with a roller furled genoa on a single headstay cannot be reefed down to create a working jib that can claw off a lee shore or beat into strong headwinds for long periods of time. A small spitfire jib hanked on a babystay added to the foredeck of a sloop is fine as a storm survival sail, but it is too small and too far aft for sailing into the wind. A staysail on a cutter rig has the same limitations. On the Shannon Scutter and Sketch a real working jib is placed on the bowsprit forward of the genoa. By placing the jib forward, helm is reduced and the high cut jib will easily tack through the slot in front of the genoa. A Shannon is sailed normally with the genoa up to winds of about 20 knots. When the wind increases, the genoa is reefed ( a 130% genoa becomes approximately a 100% genoa.) As the wind climbs the reefed genoa is completely furled, and the working jib is rolled out. If necessary in true storm conditions, the working jib can also be reefed by 30% to become an effective heavy weather jib. In addition, Shannons are equipped with a removable storm jib inner forestay for extreme conditions. The Shannon Scutter and Sketch rigs create four useable headsail combinations all available without leaving the cockpit. Another feature of the new Scutter and Sketch rigs is the control of main halyard and reef lines from the cockpit.Thus, all sails, headsails and mainsail can be set, reefed and furled by one person from the cockpit. (http://www.shannonyachts.com/offshore4.html)
Shrouds & Stays
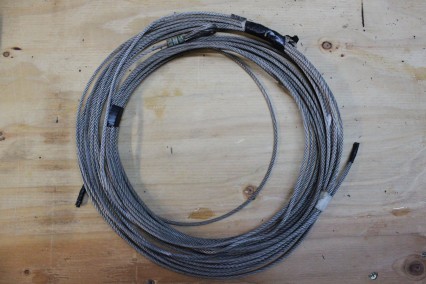
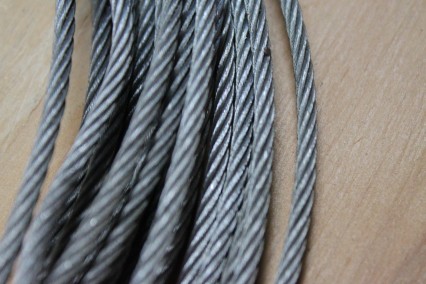
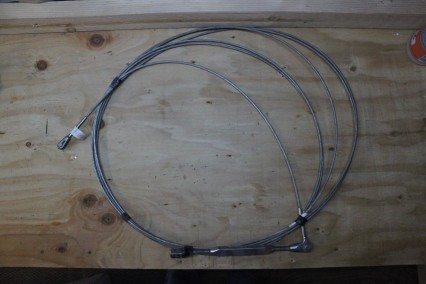
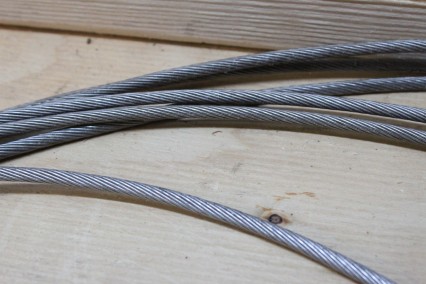
- For a boat with a 40 foot mast I would not use less than ¼” 1×19 wire. This wire has a strength of 8,200 lbs. …more than enough to guarantee that something other than it will fail before it does. Heavier than 9/32” wire will add tremendous weight aloft unnecesssarily. (From a Bare Hull, p. 374)
- Over-rigging …shows a lack of thought, for your must remember that rigging is a chain, and if any link is weak (like a tiny tang somewhere aloft) the whole thing will find its way overboard… (From a Bare Hull, p. 374 – 5)
- …stainless steel is found on most boats. Stainless steel 1×19 wire rope is generally used for standing rigging (Upgrading the Cruising Sailboat, p. 198)
- Standing Rigging. Supports the mast and includes the Backstay, Headstay, Shrouds: (http://www.sailingusa.info/parts_of_the_boat.htm)
- Shroud Lines or cables which give lateral stability to the mast.
- Spreaders – Horizontal spars which spread the shrouds from the mast.
- Headstay – A line or cable which supports the mast from the bow of the boat. If the line does not reach the top of the mast then it is also called a forstay.
- Backstay – A line or cable which supports the mast from the stern of the boat.
- Boom Topping Lift – A line which extends from the boom to the mast. Supports the boom when the mainsail is taken down..
- The choice today for stay material is between 1x 19 stainless-steel wire and solid stainless-steel rods. Rod stretches less than wire but is considerably more expensive. The lower stretchability of rod allows the mast to stand straight under great side loads…with less initial tension taken with turnbuckles. The first place you should consider using rod is in the upper shrouds, where it is especially advantageous if you increase loads by shortening the spreaders in order to allow the jib to be trimmed closer….rod rigging is not so important for cruising, where 1 x 19 is the best choice. It stretches less than the 7×19 wire rope used in halyads, but provides just a little elasticity to take the shock out of peak loading – for example, when the boat smashes through a wave. (Desirable and Undesirable Characteristics of Offshore Yachts, p. 168)
- In continuous rigging, the stay runs in one length from the mast over the spreader or spreaders to the chain plate on deck. In discontinuous rigging, each partial section between the spreaders, the mast, and/or the deck has one relatively short length of rod or wire that terminates at a tang or turnbuckle. Well-engineered discontinuous rigging reduces fatigue at spreader ends and keeps mast straighter over a wide range of sail loadings. (Desirable and Undesirable Characteristics of Offshore Yachts, p. 168)
- Hull and deck fitting attachments, such as chainplate tangs, need to be in perfect alignment with their stays (riggings that provides fore and aft support to the mast) or shrouds (rigging that provides athwartships support). Any misalignment can result in an unfair load being throw on the chainplate fasteners and/or the chainplate will flex, ultimately leading to the work hardening and failure. Flexing also opens up through-deck seals when present. (Cruising Handbook, p. 62)
- Shrouds and stays should be assembled from 316 stainless steel wire rope, not the 302 or 04 that is sometimes used. Both 302 and 304 are more prone to corrosion, which is often revealed by telltale rust stains down the rigging. (Cruising Handbook, p. 63)
- On a sailboat, the shrouds are pieces of standing rigging which hold the mast up from side to side. There is frequently more than one shroud on each side of the boat. Usually a shroud will connect at the top of the mast, and additional shrouds might connect partway down the mast, depending on the design of the boat. Shrouds terminate at their bottom ends at the chain plates, which are tied into the hull. They are sometimes held outboard by channels, a ledge that keeps the shrouds clear of the gunwales.[1] [2] Shrouds are attached symmetrically on both the port and starboard sides. For those shrouds which attach high up the mast, a structure projecting from the mast must be used to increase the angle of the shroud at the attachment point, providing more support to the mast. On most sailing boats, such structures are called spreaders, and the shrouds they hold continue down to the deck. (http://en.wikipedia.org/wiki/Shroud_(sailing))
- A good seaman naturally favors forward lower shrouds because they never have to be disconnected… (Desirable and Undesirable Characteristics of Offshore Yachts, p. 165)
- Double lower shrouds are better than single lowers because not only do they provide support athwarships, but also slightly fore and aft of the upper shroud. Double spreader rigs should have intermediates and upper shrouds either continuously run from masthead to deck, or discontinuously run to link plates at each spreader tip. (Upgrading the Cruising Sailboat, p. 201 – 2)
- The shroud angle on a cruising boat should be at least 10 degrees; 13 degrees is recommended by Yachting Monthly’s Offshore Yacht Advisory Board. (Cruising Handbook, p. 58)
- The hull structure in way of the mast and chainplates must be such that the loads on the rig do not cause the hull to deform….If a rig loosens significantly under load, as many do, some part of this equation is not right. (Cruising Handbook, p. 58)
- unless you are really planning to challenge the Old Girl, a factor of 2.5 should be adequate. If you are wondering why you should even consider the lower factor, it is because weight aloft is detrimental to both the performance and the comfort of the boat. The stays and shrouds should not be a millimeter larger than big enough. So…multiply the calculated loads by 2.5 to get the required strength of the wire. Consult the table to determine the wire size that provides the strength you need. (This Old Boat, p. 122)
- The forestay shold be at least as strong as the strongest shroud…since the tension on the forestay depends on backstay tension, it is better for the two to be the same size. An inner stay can be a size smaller. (This Old Boat, p. 122)
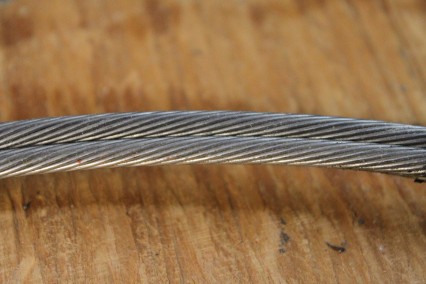
- 1×19 stainless steel wire rope is really your only choice for stays and shrouds. 7×7 wire rope, popular for lifelines and luff wires. But for standing rigging aboard a fiberglass boat, 1×19 is what you need. (This Old Boat, p. 123)
- When you re-rig an old boat, there can be value in changing to metric sizes. This is because the majority of sailboats are now manufactured somwhere other than the United States and virtually all of those are built to metric dimensions….you are going to find only metric components readily available outside of America. (This Old Boat, p. 122)
- A change to metric also makes available the possibility of substituting the higher strength compact strand wire to maintain adequate strength without the dramatic change in clevis pin size typically required to move up a full fractional size. (This Old Boat, p. 122)
- If your double lower shrouds attach to a single tang, it is essential that the tang remain free to rotate on the mounting bolt to prevent fore-and-aft movement to the mast from transferring all the load to a single shroud. This is a good place to insulate with Mylar tape. Cover the mast side surface of the tang with two layers of tape. Apply a little Teflon grease to the mast around the mounting bolt holes before installing the tangs. Do not overtighten the nut. These tangs must rotate freely. (This Old Boat, p. 136)
- Standing rigging is the system of wires, terminals and fittings that hold a stayed spar upright. In determining the size and strength of its various parts, the wire is generally regarded as the necessary part – bulkhead, chainplate, tang, terminal, tunbuckle, ping, etc., should be stronger than the wire. If the terminals are engineered to 110% the breaking strength of the wire, little is gained by engineering the chainplates or tangs to 150%. (Upgrading the Cruising Sailboat, p. 198)
- The first number refers to the number of strands in any given length of rigging, the second to the number of wires in each strand. (Upgrading the Cruising Sailboat, p. 198)
- In preparing a boat for cruising, common sense advice is to replace all standard rigging with wire rope one size larger…Larger turnbuckles, clevis pins, chainplates and tangs will probably need to be fitted so that each part is stronger than the wire. If a fitting has a lower breaking strength than wire, no advantage is gained. (Upgrading the Cruising Sailboat, p. 198)
- See figure 10-12b in Upgrading the Cruising Sailboat, p. 200, for a suggested wire diameters for cruising boats graph
- Weight and windage aloft are considerations, but less so for the cruiser than the racer. For the cruiser, the ultimate goal is to keep the rig standing. Using the same size turnbuckle and wire for all standing rigging simplifies the spare parts inventory. (Upgrading the Cruising Sailboat, p. 200)
- The general rule to be observed aboard the cruising boat is that every wire should have a backup in the event of a rigging failure….simply another wire that can absorb a large share of the load if the primary wire breaks. (Upgrading the Cruising Sailboat, p. 201)
- For every mast support, there should be an equal and opposite support to keep the mast rigidly stayed in column. (Upgrading the Cruising Sailboat, p. 201)
- If you are changing the rig the rig in any way, make sure all the new parts are compatible. That means you must preassemble each piece with whatever it connects to. Heavier wire usually necessitates thicker and wider tangs and often heavier chainplates. (This Old Boat, p. 126)
- Perhaps you have heard that rigging wire stretches when it is placed under load. That’s true. So shouldn’t we cut the wire a bit short to allow for this stretch? No. This initial elogantion, is called “constructional stretch” is typically only about 0.02% in 1×19 stainless steel rope. That means a 50’ stay will stretch about ⅛”, not enough to be of concern. (This Old Boat, p. 128)
- Be sure that all links in the rigging system are as strong as one another; the whole system is like a chain.
- Twin forestays enable hanking on twin jibs for downwind sailing, but unless they are anchored by separate fittings, the alternate loading on one stay and then the other can cause fatigue of tangs and possible stemhead fittings. (Upgrading the Cruising Sailboat, p. 201)
- Inner Forestay I – An inner forestay can be set in heavy weather to help keep the mast in column, and hopefully keep the spar standing if the forestay goes – at least long enough to make repairs. (Upgrading the Cruising Sailboat, p. 201)
- Inner Forestay II – Regardless of her rig, any boat heading offshore should carry a forestay (inner forestay) for setting a small storm forestaysail in storm conditions. This stay runs from partway down the mast to the foredeck where the stay fitting must be strongly backed up…there should be a strong halyard to hoist the sails using this stay…you want to carry storm sails as close to the mast as possible in order to facilitate their handling and to keep the boat well balanced. Carrying a storm jib out on the bow can cause lee helm….the inner forestay should be opposed by special running backstays, often called “checkstays”, to keep the mast straight and in column when the storm forestaysail is set in very rough conditions… (Desirable and Undesirable Characteristics of Offshore Yachts, p. 165)
- Inner Forestay III – How inboard should the inner stay be? Typically the distance between the deck fitting of the two stays will be about a quarter of the J dimension – the distance between the stem fitting and the mast – although there is nothing sacred about this ration…most fiberglass boats have a bulkhead between the forward cabin and the chain locker. If this bulkhead sits betwen 20% and 35% from the stem, locating the lower end of the stay at the juncture of the bulkhead and the foredeck will simplify the installation. A chainplate of adequate strength is passed through a slot in the deck and bolted to the bulkhead, effectively spreading hte load to the full width of the deck (and to the hull if the bulkhead is strongly bonded in one place). It is imperative that the protruding part of the chainplate is properly bent so that the pull of the stay is fair. (This Old Boat, p. 132 – 3)
- See image from Desirable and Undesirable Characteristics of Offshore Yachts, p. 164
- Twin Backstays – Single backstays are easily replaced with twins, one to each quarter. This requires fitting chainplates either on the hull sides or to knees glassed inside at the hull-deck join. At the masthead, two tangs must be fitted. Alternatively, the single backstay can be left and running backstays added port and starboard. (Upgrading the Cruising Sailboat, p. 201)
- Baby Stay – …the so-called “babystay”, which provides fore-and-aft support for the lower mast when there are no forward lower shrouds…many attachment and adjustment systems have been used on these stays. The simplest is a sturdy turn-buckle attachment to the deck with the proper-sized trigger-type snap schackle, which does not rely on a pin for security. Another good system utilizes a Hyfield lever, which, however, can pinch fingers and catch sheets…[both babystay and forestay] should be adjustable as well as removable, to facilitate tacking and jibing the spinnaker pole. (Desirable and Undesirable Characteristics of Offshore Yachts, p. 165)
- Forestay – Forestays tend to sag off more than any other stay, and if an unfair load is placed on any fitting, such as the terminal, turnbuckle or tang, consider adding a toggle to provide greater articulation of the wire and terminal and to prevent twisting. This will lengthen the life of the wire. (Upgrading the Cruising Sailboat, p. 205)
- Solent Stay I – There is an inner stay that can make sense as a retrofit for single headsail rigs. A solent stay is mounted just aft of the headstay and is intended to allow flying an alternative headsail rather than an additional one. Because of its geometry, it is easier to rig. Beyond the wire and fittings to attach it, it does not necessitate much – if any – additional hardware…At the deck you want the stay as far forward as possible to maximize the foretriangle available for the sail you fly from this stay, but it must be far enough aft not to foul the headstay, which likely has a roller-furled sail on it. At the masthead you want the stay attached as near the backstay attachment as possible to avoid the need for runners. Making the solent parellel to the headstay looks better but is not actually necessary since you will never have both stays in use at the same time, except perhaps when running…The deck is..not stiff enough to anchor the stay, but a short link to a knee fiberglassed into the bow in the chain locker resolves this issue….You will need a way to disconnect the stay when it’s not in use, but this does not have to be complicated. you simply back off the turnbuckle and pull the clevis pin that attaches it on the wire. (This Old Boat, p. 134)
- Solent Stay II – Essentially, the Solent Stay is an inner stay that is placed just below the masthead and the existing forestay’s attachment point, thereby benefiting from backstay tension and eliminating the need for off-setting running backstays…and possibly also the inner tracks, cars and blocks for the sheet leads to the cockpit (see Figure 1)…Equipped with a release lever, the Solent can be removed from the foredeck and, because it’s geometry is different from a staysail stay, most likely secured directly to a bail on the side deck, just aft of the forward lower shroud, a simple and functional stowage location….The only other additions required for a Solent Stay are the sail and perhaps a dedicated set of blocks on the existing genoa track along with dedicated sheets left attached to the sail. Offshore, one can choose whether to leave the stay set up with the sail hanked on and bagged – and perhaps the sheets pre-run through their respective blocks – or the stay can be left stowed on the side deck with the sail in its locker. This essentially is a choice between easier tacking/jibing and being continuously prepped for bigger winds…The primary reasons to consider a Solent Stay rather than a staysail stay include the fact that the installation is simpler and less costly, it may clutter the deck less if additional tracks are not added, and it also makes the use of a longer luffed sail possible, e.g. to supplement the genoa under some sailing conditions as when sailing across the wind in lighter conditions and looking for every ounce of sail pressure you can apply to the boat. Its disadvantages are that the headsail needs to be partially furled in order to tack or jibe it, and the sail is not as useful across as many points of sail as a staysail might be. (http://www.svsarah.com/Whoosh/WhooshPrepMods.htm)
Spar
- Extruded aluminum spar sections are by far the most common today…Determining the dimension and wall thickness of aluminum spars is best left to an experienced sparmaker. Considerations include the height of the spar, fractional or masthead rig, method of staying, boat stability, type of aluminum used, and whether the spar is to be stepped at the keel or on deck. A cruising spar should be as thick as feasible, with consideration given to weight aloft and the ability of the stays and shrouds to hold it in column with a given staying base. (Upgrading the Cruising Sailboat, p. 194 – 5)
- Once an aluminum spar is buckled or even slightly dimpled, it is probably unsalvageable…Most aluminum masts, however, seem to break at the spreaders, and if one is able to bring it back aboard, lash it and make port, he would be well advised to consult a sparmaker before trying to fix it with a sleeve. A new mast, perhaps of thicket wall section, probably will give more confidence. (Upgrading the Cruising Sailboat, p. 195)
- The fewer holes drilled in an aluminum mast the better. Of course, it is necessary to drill holes or weld on plates for mounting bosses, tangs, winches and cleats, and these should be placed with some knowledge of how holes and welds can weaken a section. Small holes are of no great concern, but larger holes such as for inspection or internal halyard exits, should be staggered to minimize weakening of the mast. (Upgrading the Cruising Sailboat, p. 195)
- If you have eliminated any of the fittings, move them, or changed the way they are mounted, don’t leave the old mounting holes open. Put a screw in each one, coating the threads of the screw with thread sealant. (This Old Boat, p. 136)
- There should be a drain hole at the base of the mast, usually drilled through both the mast and the heel fitting. Be sure that the hole is clear; if you found significant corrosion inside the mast, enlarge the hole. (This Old Boat, p. 136)
- Use runner reflective tape on your mast so you can shine a light and see your mast at night in a crowded harbor or at a foggy night at harbor. (www.tidalpool.org)
- …[the mast] should be unstepped every few years and major fittings such as spreader bases and tangs removed to inspect for corrosion. Similarly, cracks should be dealt with promptly. A stop gap is to drill a hoe at each end of the crack to prevent it from spreading. Have the crack welded at the earliest opportunity. (Upgrading the Cruising Sailboat, p. 195)
- Deck-stepped masts should have drain holes at the base to allow water inside the bottom to drain out. It is quite likely that the base of the mast frequently will be wet, and thus it is important that the mast to prevent corrosion. Drain holes at the base actually may introduce water inside. (Upgrading the Cruising Sailboat, p. 195 – 6)
Spreaders
- Spreader failures, along with wire terminal failures, are probably the most common cause of dismastings, and so much be strong and properly installed. Most rigs have single or double spreaders. Because the wider shroud angle the less load exerted on the spar, the cruising boat should have the widest spreaders possible, without extending to the rail of the boat. (Spreaders are notorious for locking with your neighbor’s during raftups, or damaging themselves when the boat is tied to a high pier). (Upgrading the Cruising Sailboat, p. 197)
- Racers have brought their shrouds more inboard during recent years to narrow the sheeting angle of headsails, giving them better windward ability. But this is of less concern to a cruiser, who is more interested in keeping his rig than pointing a few degrees higher. (Upgrading the Cruising Sailboat, p. 198)
- For the cruising sailboat, the shroud angle from the masthead should be more than about 12 degrees out from the perpendicular line of the mast. The angle can be increased by shortening the spar (not very realistic), widening the spreaders, or adding another set of spreaders, enabling the first set to be moved higher up. The second set also reduces the load on the first set. While double spreaders strengthen any rig, (the load on upper shrouds is reduced by about 15%), they are particularly advisable on boats over about 45’, where the spar height is such that the shroud angle becomes too narrow. (Upgrading the Cruising Sailboat, p. 198)
- Fixed and articulating spreaders are both viable choices, with the latter getting the edge because of its ability to move fore and after under stress, such as when the mainsail is let out on a downwind run. Neither fixed nor articulating spreaders must be allowed to shift position up or down. All spreaders should bisect the shroud angle at the spreader tip so as not to create uneven forces on the spreader, and to prevent the spreader from moving up and down. (Upgrading the Cruising Sailboat, p. 198)
- Airfoil section spreaders with tapered leading and trailing edges are commonplace on racing boats now because they offer less wind resistance. They should be anlged down on the leading edge 10 – 15 degrees so they offer less wind resistance when the boat is heeled. (Upgrading the Cruising Sailboat, p. 198)
- Regardless of spreader tip configuration, they should not allow the shrouds to jump out when sudden loads are exerted on the jib, such as when slamming into head seas, or jibbing. (Upgrading the Cruising Sailboat, p. 198)
- Rubber spreader boots, leather or anti-chafe material should be taped to the spreader tips to prevent chaffing overlapping headsails or eased mainsails. (Upgrading the Cruising Sailboat, p. 198)
- Weight savings also can be achieved by adding more spreaders and paring down the wall thickness between them. In terms of a performance conscious mid-size cruising boat, the two-spreader rig has found almost universal acceptance; on smaller boats and those less concerned with performance, a single set of spreaders is the norm. (Cruising Handbook, p. 58)
- Spreaders should never extend beyond the beam of a boat. If they do, they will get damaged alongside tall wharves and foul the rigging on other boats when rafting up. (Cruising Handbook, p. 58)
- …spreaders should bisect the angle of the shroud they are supporting; if they do not, there is a risk of the spreader collapsing under load and the rig coming down. (Cruising Handbook, p. 58)
- No single method of calculating shroud loads is universally recognized, but you should get satisfactory results if you assume, for a single-spreader rig, 45% of the load on the upper shroud and 55% on the lower. With twin lowers, each carries about 32.5% of the load. (I know that adds up to more than 100%; I don’t make up the rules) (This Old Boat, p. 122)
- Spreaders are designed to withstand compression loading, not leverage. Unless the spreaders bisect the angle between the lower half and the upper half of the shroud, you are inviting spreader failure and catastrophic implications. Precise adjustment is not critical, but if the spreaders on your mast are not canted upward (above horizontal) by about ½ the angle the shroud forms with the mast – typically making the spreader inclination around 7 – 8 degrees – you may need to modify the base of the fittings. (This Old Boat, p. 136)
- For even more prizes, you fit a set of spreaders – Figure 4. Doing so has three real benefits. The first is that the shroud angle is increased, so decreasing the shroud tension and the topmast compression. Secondly, the mast is split into “panels”, i.e. their effective length is reduced, so increasing the buckling load for a given section. Lastly, and this is a touch esoteric, splitting the panels also forces a particular shape that the mast will fail in under buckling. In effect the fixity of the end at the spreader is somewhere between pinned and fixed because there must be a continuous curve joining the mast below the spreader to the mast above it. In practice, though, one usually makes the assumption that both the upper and lower parts of the mast are pinned at this point.The drawback with spreaders is that they introduce a sideways force in the middle of the mast. To overcome that, lower shrouds are fitted (except in racing dinghies and similar craft where spreaders are used deliberately to influence the mast bend ). To the sample mast I’ve added a set of spreaders two thirds of the way up the mast, and made them 90% of the width of the beam. The shroud angles have gone up to 24o (caps) and 14o (lowers), well above the minimum of 9o. Shroud tensions are now 1.24 tonnes – 4mm wire – for the caps and 1.93 tonnes – 5mm wire – for the lowers. Though the lower part of the mast is still subject to about 3 tonnes compression, the topmast compression is down to 1.13 tonnes. This allows a 50mm topmast, and 75 or 90mm lower mast diameters, depending on deck or keel stepping. The spreaders themselves take a load of about 0.5 tonne, and because they too can be considered as slender, need a section of about 45mm x 20mm if made of the same stuff as the mast.So we have here the beginnings of a progressive trade-off involving weight, windage, complexity and cost which can be carried to the umpteenth degree by adding more and more sets of spreaders. For us ordinary mortals, two sets is usually about the limit for sails which run in tracks on the mast, and one set is sometimes possible for sails whose attachment to the mast involve lacing, hoops, jaws or saddles. (http://www.classicmarine.co.uk/Articles/masts.htm)
- Spreader Bases I – On aluminum masts, the spreader bases should be welded or thru-bolted to the mast with compression tubes over the bolt inside to distribute the loads to both sides of the mast. (Upgrading the Cruising Sailboat, p. 198)
- Spreader Bases II – Properly mounted spreader bases will be at least through-bolted. They may also be welded or attached to opposite ends of a fitting that passes all the way through the mast, sometimes called a spigot…The bolts should pass through compression sleeves – thick-wall aluminum tubing as long as the mast is wide….consider altering them [spreader fittings] to incorporate compression sleeves….Make the baseplate as large as possible to spread the load…The holes have to be large enough, at least on one side, to admit the compression tubes, so keep the bolt size modest. Be sure the tubes, not the mast wall, take all the compression. A four bolt pattern works well, but two bolts are adequate if the base is broad and the bolts a size larger than those originally fitted. Holes in the mast weaken it, particularly when they are in a line, so try to use the existing holes, enlarging them as necessary to accommodate the bolts and sleeves. If that is not possible, move the spreader bases up the mast slightly so the new holes will not be among the old ones. This will alter the geometry of the rigging slightly but the implications are far less serious that drilling additional holes in line with the existing ones. (This Old Boat, p. 115)
- Spreader Sockets – Spreader sockets are a frequent source of problems and failures. The sockets must be designed to spread high loads over a large area of the mast. To minimize drag on the racing circuit, spreaders are given knife-like trailing edges. Unfortunately, this style of spreader is finding its way onto cruising boats where the performance advantages (minimal) are vastly outweighed by the increased likelihood of mainsail damage when the sail is let all the way out of f the wind. (Cruising Handbook, p. 58)
Terminals
- …a stay is only as strong as its connection with the mast, spreader or deck, where terminals…are secured to turnbuckles or tangs….With wire, several possibilities exist. The best wire terminals are the swaged ones known as “Tru-Lock”. The swaging should match the wire exactly. Make sure that both are in either metric or English dimensions, and not on each (otherwise there will be a mismatch)…. (Desirable and Undesirable Characteristics of Offshore Yachts, p. 169)
- …swagged terminals should be inspected periodically. If there is any sign of longitudinal crack (a possibility under the great pressure of swaging), or if the swaging is out of alignment with its stay, the swaging should be replaced immediately. (Desirable and Undesirable Characteristics of Offshore Yachts, p. 169)
- Water may seep between the terminal and the wire and cause corrosion. To keep water out, plug the top of the terminal with sealant. (Desirable and Undesirable Characteristics of Offshore Yachts, p. 169)
- Warm salt water poses the greatest danger to standing rigging, and the point of attack is frequently the terminal fittings connecting the wire to the turnbuckle, tang or chain plate. Almost every type of terminal encloses the wire and prevents quick evaporation of water, which eventually begins to corrode the wire. (Upgrading the Cruising Sailboat, p. 202)
- Terminal fittings should be sufficiently strong that if the entire stay or shroud is subjected to a bench test, the wire will break before the terminal lets go. (Upgrading the Cruising Sailboat, p. 202 – 3)
- Terminal Types – The least expensive method, and one of the strongest, is the splice. With practice, a hand spliced eye can last for years and certainly exceeds the breaking strength of the wire. The only difficulty is that splicing 1×19 is very dificult…poured sockets are used on elevators and cranes, which should say all that’s necessary about their strength….in contrast to metalurgical bond of poured sockets, and the friction bond of hand splicing, most other terminals types rely on mechanical bonds, that is, by squeezing the terminal onto the wire. Properly executed, mechanical bonds can be quite strong, but there is always the risk of excessively or unevenly distorting the wire. (Upgrading the Cruising Sailboat, p. 203)
- Most wire rigging is installed with swage-type terminals that are attached by cold-molding the metal of the terminal around the wire. All swaging tends to work-harden the metal involved. The use of incorrect swaging pressures and or the repeated rolling of fittings make the terminal brittle and prone to premature failure. There are different types of machines for swagging that stress the terminal to a greater or lesser extent. A one time pass-through hydraulic machine produces the best results; a manual boat yard machine impose higher stresses with a greater probability of premature failure; and rotary hammers do the most damage…When swages are used on the lower ends of rigging, water wicks down into the terminal, causing corrosion and accelerating failure. (Cruising Handbook, p. 63)
- Swagless terminals (e.g., Norseman and Sta-Lok) are more reliable, in addition to which they can be removed and reinstalled with normal hand tools without having to replace the wire rope.
- Swagless terminals are, in my opinion, the only terminals to consider. I personally prefer the design of those made by Sta-lok, but once installed, the equally common Norseman terminals are just secure. (This Old Boat, p. 124)
- Put a pea-size blob of 3M 101 polysulfide sealant inside the end fitting then screw it back together. As you tighten, sealant will squeeze out where the wire enters the fitting…polysulfide does a better job of waterproofing the terminals….Do not over tighten – no more force than you can apply with one hand – and do not fail to lubricate the threads with Loctite before the initial assembly. Swagless terminals are reusable indefinitely. All you will need are new cones and maybe new formers. (This Old Boat, p. 122)
Tabernacle
- The issues posed by tabernacles are slightly different. Firstly, the pivot bolt should not be under load when the mast is stepped. The heel of the mast should bear on the deck, so either arrange some sort of wedge arrangement, or make the pivot bolt holes of such a size that the bolt becomes loose when the mast is upright. Secondly, it is important to take the load from the tabernacle into the structure of the boat. The easiest way to do this is to fit a pillar under the tabernacle which runs down to a step on the keel. If this fouls up the interior arrangement, it is possible to take the load on a bulkhead. The snag here is that generally one needs a doorway. If that can be made off centre, then the bulkhead can be locally stiffened on the centreline to take the load. If the doorway must be on the centreline, then some thought needs to be given to transmitting the load. Unless there is a huge beam, then an arch-topped door opening is usually the best bet, even though you may have to duck to get through it. Remember that as a rough rule of thumb, the mast is exerting a point load about the same as the weight of the boat, and that must be absorbed.Above deck, a tabernacle is often used as the base for either a pinrail, or for turning blocks so that halyards and reefing lines can be led aft. Either arrangement is fine, so long as the lines do not foul the mast hoops or the saddle or the jaws. In my experience, they usually do, which is one of my reasons for disliking the trend toward leading all lines aft to the cockpit on a non-Bermudan boat. With a few exceptions, separate pinrails and reefing at the mast tend to be a more satisfactory solution – but I’ll deal with this whole topic later. Another trick is to incorporate the gooseneck onto the after face of the tabernacle, so that the mast can be lowered without un-rigging the sail. This is useful on Broads boats, where the ability to shoot bridges is handy, but the number of times I hear the French canals cited as the reason for a lowering mast borders on the incredible. Anyway, if you wish the gooseneck on the after face of the tabernacle, and you wish to lower the mast on a regular basis, leave lots of vertical clearance between the pivot bolt ant the gooseneck. It is amazing how much height a stowed sail takes up, and if I had a pound every time I’ve got this wrong……..For craft up to about 20 feet long, there is a neater arrangement than a tabernacle for providing a mast hinge which works fine as long as the lowered mast does not have to clear a cabin top or similar obstruction. I “borrowed” the idea of a “mast shoe” from Iain Oughtred’s Wee Seal. Figure 5 describes it more quickly than I can in words. (http://www.classicmarine.co.uk/Articles/mast_furniture.htm)
- A tabernacle mast step is a very nice idea. Not only will it enable you to have greater freedom in roaming below low bridges through the canals of Europe and Asia, but it will also enable the mast to drain completely and easily, and to air at all times…one great advantage over its unhinged counterpart. You can rake the mast at whatever degree you desire, while a standard mast has to sit evenly on the mast step. If you rake a standard mast too far forward or aft you will cause one end of it to lift from the step, putting all the compression strain caused by the stays on the other end. This strain can cause premature metal fatigue and potential buckling. (From a Bare Hull, p. 362
Links
Tabernacle
- Mast Raising – http://www.tropicalboating.com/sailing/mastraising.html
- Self Stepping Mast – http://www.boatus.com/goodoldboat/maststepping.asp
Comment Form