Galley
Image Gallery
Research
Counter
- Counter space is always at a premium. A well-planned galley should have at least one dedicated section of working countertops that can be used at all times. On blue water boats all countertops should have deep fiddles on their edges to keep objects from flying off the counter when the boat is heeled. Fiddles should have scalloped exits at the corners so that counters can be easily wiped clean. (The Modern Cruising Sailboat, p. 223)
- Solid-surface countertops, such as Corian, are also popular with boaters rejuvenating their galleys. Although a very expensive addition in a big kitchen…The least expensive option for freshening up your countertops is to put new Formica down. Our choice of a predominately white counter top, back splash, and head-liner act as great reflectors of light. They make the overall area brighter, allowing us to use lower wattage light bulbs, thereby saving battery power and generating less heat. (http://www.sailnet.com/forums/gear-maintenance-articles/19734-renovating-galley.html)
- See image galley 8.jpg for a great idea on how to integrate the counter/sink.
- Unlike plastic laminate – which depends on a thin layer of melamine for its durability – Corian, Fountainhead, and similar solid surface materials are substantial and robust, and because the material is homogeneous, scratches and even burns can be polished out. Solid surface counters are much lighter than stone – but much heavier than plastic laminate on plywood. Half inch solid surface weighs around 4.5 pounds per foot, so proceed cautiously if you have considerable counter area. Not much tensile strength, so it requires a solid underlay. Solid surface counter material is normally 1/2 thick. Fabricators often double the thickness at the edges, but a 1-inch edge can look odd in a boat. (This Old Boat, p. 106)
- (See image from Desirable and Undesirable Characteristics of Offshore Yachts, p. 133)
- There should be adequate counter space with well-raised edges and high sturdy fiddles. Stainless steel is the best material for the counters, since it will not be charred by a hot frying pan. Butcher lock maple is both attractive and functional, but plastic that is not resistant to heat is no good. (Desirable and Undesirable Characteristics of Offshore Yachts, p. 132 – 3)
- As a general rule of thumb, counters should be 32 – 36” high and 18 inches wide, and preferably incorporate a 3×3” kick space at the base (which makes it more comfortable to stand at the counter).
- Nowadays almost all quality boatbuilders use Corian for countertops, which is far superior to either wood or plastic laminates. Better yet is a molded Corian countertop that includes a splash rail at the back, thereby eliminating a joint which, no matter how well sealed, eventually is always penetrated and stained. (Cruising Handbook, p. 137)
- Corian Fountainhead, and similar solid surface materials are substantial and robust, and because the material is homogeneous, scratches and even burns can be polished out...it looks good. much heavier than plastic laminate on plywood. In a light displacement boat, exchanging a sizable laminated counter for a solid surface is almost certain to give the boat a list. Half-inch surface weights about 4 ½ lbs. per sq. ft., so proceed cautiously if you have considerable counter area. Also do not assume that you will save the weight of the existing plywood counter. Solid surface material has good sompressive strength but much tensile strength, so it requires a solid underlay. You might be able to move to thinner plywood, but you will need to install the counter over a solid base. (This Old Boat, p. 106 – 7)
- Solid surface counter material is normally 1” thick. Fabricators often double thickness at the edges to give the illusion of mass, but a 1” edge can look wrong in a boat. A single thickness at the edge with and undermolding is likely to be more pleaseing. This also allows for shoter overhang, an issue when space is at a premium. (This Old Boat, p. 106)
- Use mica laminates over plywood to replicate molded fiberglass furniture, for example, or wood veneers or solid lumber in a wood interior. (http://www.cncphotoalbum.com/doityourself/icebox/build_icebox.htm)
- Once again, use caulking in the joint between the box insulation and the counter insulation. It will probably not be possible to glass this joint on the inside, but a good caulking job will suffice to provide an adequate seal. Remember to paint the inside of the box before in- stalling the top, because it’s no fun to try to get your head inside the opening lid to do the job. (http://www.cncphotoalbum.com/doityourself/icebox/build_icebox.htm)
- Formica counter on top of ½” plywood (Upgrading the Cruising Sailboat, p. 69)
- Corian – The makeup of solid-surface material varies slightly by manufacturer, but the basic recipe is a blend of crushed minerals, plastic resins and binders. The biggest advantage the material claims over other countertop products is that the color and pattern are solid throughout. If the counter gets scratched, you can simply sand the damage away. The material is nonporous and very hard, but it is a bit more forgiving than natural stone or ceramic tile if you set down your coffee mug carelessly. In addition, it is heat resistant and less likely to chip than harder materials. From a machinability standpoint, solid-surface material is like very hard medium-density fiberboard, or MDF. Tooling it is a slower process, but with care you can get very smooth results on the first pass. It can also be sanded easily and buffed to a high gloss. A router and a trim saw can handle most of the cuts you’ll need to make to install the countertop. Carbide-tip bits and blades are required.Although cutting, profiling and drilling solid-surface material isn’t difficult, it is very messy. Whenever possible, do the work outdoors, and use dust extraction to manage the resinous shavings (which will cling to almost any surface). Wearing a particle mask is recommended…..Save a few scrap pieces of solid-surface material in case you need to make repairs in the future. Solid-surface repairers use special tools to cut out damaged areas and fill them with plugs cut from the extra material. (http://www.naturalhandyman.com/iip/infcountertop/infsolidsurface.html)
Design
- Smaller, more traditional monohull yachts from the early 20th century onward most often had galleys arranged around the companionway…the sink was normally crammed under the bridgedeck as close to the centerline as possible that wouldn’t flood when pitched to leeward. Such companionway galley layouts have important advantages: the galley is near the middle of the boat and its proximity to the companionway makes it easy for the cook to hand food out to the cockpit and keeps the galley well ventilated. On a blue water boat, a U-shaped galley is preferable, as the cook can brace against solid furniture no matter what way the boat is heeled. (The Modern Cruising Sailboat, p. 220)
- There should be one or two strongpoints in the galley and overhead so the cook can wear a harness and clip on in heavy weather.
- Great forum post containing lots of images of galleys – http://www.cruisersforum.com/forums/f55/show-us-your-galley-24896-4.html
- Try to sit down to work when you can. And when you can’t, find ways to brace yourself so that if the boat rolls, you won’t lose your footing. This is particularly important when doing something that could result in an injury, such as using a knife or pouring boiling water. (http://theboatgalley.com/boat-cooking/)
- The three major units – sink, stove and icebox / fridge – should be close together so the cook can reach all three without having to move. (Desirable and Undesirable Characteristics of Offshore Yachts, p. 132)
- A U-shaped configuration…permits the cook to brace themselves against fore-and-aft motion. (Desirable and Undesirable Characteristics of Offshore Yachts, p. 132)
- The well-thought-out galley will have sufficient storage space for foodstuffs: cans, boxes, jars, bottles. Cutlery and plates and pans should be stowed in a secure place where they won’t fall out when the boat heels, yet are within arm’s reach when the cook wants them. Cutlery is best left inside drawers that are notched inside the facing to keep them from spewing their contents when the boat heels. Plywood spacers or plastic cutlery dividers inside the drawers maintain a semblance of order. Pots and pans, especially the heavy cast-iron variety, are best kept low, for better weight distribution for safety. Underneath the galley or in a padded bin against the hull is ideal. (Upgrading the Cruising Sailboat, p. 228)
Equipping
- Buy your bleach at a pool supply store, the bleach is 2 1/2 times more concentrated, thereby taking up less space, and the jugs are heavy duty plastic (retails about 1.80 per gallon) (http://www.cruisersforum.com/forums/f91/garbage-44525.html)
- Most cruisers want a teakettle with a whistle for making instant coffee, tea or soup. (Cruising Handbook, p. 138)
- Grain Grinder – Flour that sits around in the mill house awhile, and sits again in a distributor’s warehouse before being shipped to the store where you buy it, is already stale and devoid of much of the original wholesomeness. When the flour is stored on the boat for months before it is used, you may as well eat sawdust. This is why you should grind your own flour from while wheat, rye, barely, buckwheat, oat, triticale, millet, rice, etc. This will insure absolute freshness with all the sensitive vitamins and oils intact. The grinding tool to do this is an extremely cheap and simple piece of hand-powered equipment. It is similar to a meat grinder, only larger, having grinding stones or burred steel plates instead of cutting blades. (Sailing the Farm, p. 68)
- Food Chopper – they are very handy for grinding nuts, sprouts, died foods, fresh fruits, vegetables, etc. A food chopper will also prepare any fruit or vegetable for juice extraction in a juice press for really nutritious, thirst-quenching drinks. (Sailing the Farm, p. 69)
- Juicer – Fresh raw juices are probably he most nutritious foods you can eat….When you’re in port or anchored by some tropical beach, and you can get fresh fruits and vegetables, you’ll find a juicer is an invaluable tool and a great asset to your health. There are two common types of hand-operated juicers…One is a device that grinds and squeezes the pulp to extract the juice. Pulp exists from one orifice and the juice from another…The press is another kind of popular juicing tool. These may either be constructed wit a screw or hydraulic mechanism to develop pressure on the juice-filled pulp. The food must first be ground using a food chopper, grinder or grater in order for the juice to be efficiently extracted. Employment for the pres can be found in other operations around the boat…when making cheese or tofu….Developed hydraulically, the device….is capable of producing 6,000 lbs. of pressure. This is more than enough to accomplish all sorts of bending and pressure jobs required around the ship from time to time. (Sailing the Farm, p. 70 -1)
- Blender – I consider a blender to be the handiest tool in he gallery with the possible exception of a pair of chopsticks. A blender can grind grain, make sauces, soups, salad dressing, fruit smoothies, fruit leathers, the smoothest pancake batter, vegetable and seaweed powders….You name it, a blender can do it. They can add all kinds of foods to your sea-going diet and makes many otherwise arduous tasks a real snap. There’s also a 12 volt model available that uses less current than the 120 volt unit with an inverter. Which ever type you choose, you’ll find that running a blender for a few seconds a day results in an insignificant loss to the ship’s battery charge. (Sailing the Farm, p. 71 – 2)
- Cutting Board I – Wood harbors bacteria. In most hot and humid places that cruising boats go, it’s not a good choice as it is impossible to completely clean. Not only will wooden cutting boards and spoons look bad, they can lead to food poisoning. (http://theboatgalley.com/buying-guide/)
- Cutting Board II – Another handy item is a chopping board that fits inside a sink rim so that it does not slide around when in use. The chopping board also needs its own stowage space. (Cruising Handbook, p. 137)
Equipping – Pots & Pans
- ..the long-term voyager will need a range of pots of different sizes, frying pans, cake pans, bread pans, pizza trays and roasting pans. These take up a lot of space – all need a home. Pots are easier to stow and less likely to get overturned when in use if they have small handles on either side, rather than the typical long one that sticks out. (Cruising Handbook, p. 138)
- Melamine, which is almost unbreakable, is the best all around material for dishes…can be bought with nonskid inserts on the base. Corelle (from Corning) is also nearly indestructible and has a less plastic feel than Melamine. However, on occasion, it will shatter explosively into thousands of minute pieces…Whatever dishware is bought should have straight rather than curved sides. Curved ones slide over the top of all but the highest fiddles, launching the bowl into space. (Cruising Handbook, p. 142)
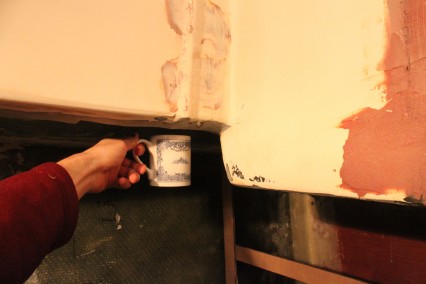
- Cups are inherently unstable and have no place on a boat; instead, flat bottomed mugs should be used.
- Cutlery (especially knives) should not have heavy handles. Otherwise, things will be forever falling off plates. All cutlery should be made from good quality stainless steel…sharp knives are best stowed in a knife block rather than loose in a drawer. (Cruising Handbook, p. 142)
- Useful Pan Sizes – In 6 years, I never felt the need for another size pan. This set includes a 1-1/2-, 2-, and 3-quart size sauce pan, with a 5-quart stock pot and a 9-1/2 inch frying pan. For 2 people living aboard, and occasional guests and pitch in dinners, I never needed anything else. The two lids each work with several of the pans, and on the few occasions that I needed a third lid I just used a piece of aluminum foil. Another consideration is that these sizes of pans will fit in almost any pot restraints (if your stove is particularly small, you may want to measure). (http://theboatgalley.com/pots-pans-boat/)
- Pans can take an inordinate amount of space in a boat kitchen. These (magma) take up a space about 12 inches by 12 inches by 6 inches high, due to the nesting design and the fact that the handles are removable. (http://theboatgalley.com/pots-pans-boat/)
- First thing to look for in pots and pans is good quality stainless steel. While aluminum can be used it can be subject to pit corrosion from salt water and its life will only be a fraction of what you can expect from good quality stainless. Stainless steel is not a good conductor of heat you should be looking for pots with sandwich construction in the bottom. This type of pot will have a thick piece of aluminum, or even better, copper, bonded to the bottom of the pot and sealed with stainless steel on all sides. Without this a stainless pot will heat unevenly leading to poor cooking. Look for a particularly heavy design and make sure that there is no place along the bottom where corrosive salt water can get to more sensitive metals. A good frying pan or skillet, two to four pots in various sizes and a standard set of utensils should be adequate for most needs. (http://theboatgalley.com/pots-pans-boat/)
- Nonstick pans take less water (and effort) in cleaning up, but nonstick coatings varying quality, wearability and scratch resistance. Of those popularly available, Silverstone is generally the toughest, followed by Teflon II and then regular Teflon.Poor nonstick won’t just scratch, it will peel away and the pan will end up virtually unusable. (http://theboatgalley.com/buying-guide/)
- nonstick pans and items that don’t have little cracks and grooves that are hard to wash by hand are best. Nesting pans, bowls and storage containers conserve space. (http://theboatgalley.com/buying-guide/)
- Those removable handles actually do several things for this set (magma) — they make it so that the pans nest together much more tightly so that they take less space; they make it so that the pans can be used in the oven as well as on the stove top; and they make the pans more suitable for use as serving dishes (for example, the sauce pans make nice salad bowls if the handles aren’t attached) (source)
- High quality, heavy stainless steel is always a favorite of mine. It is highly rust resistant and won’t break unless you really abuse it. In pans, the heavier the stainless the better — it’s less likely to warp as it heats and cools, and it will also conduct heat more evenly. (http://theboatgalley.com/buying-guide/)
Equipping – Pressure Cooker
- …a pressure cooker is truly worthwhile investment on a cruising boat: it cooks faster, saves fuel, puts less heat into the cabin, does not spill, can be used for canning, and is an excellent container in which to take hot food in the dinghy if going to a potluck supper. It does, however, use a lot of storage space. (Cruising Handbook, p. 138)
- One thing that you will most certainly want to have on board is a good quality pressure cooker. Again, look for stainless steel with a heavy bottom. There are a number of designs but, given the narrow confines of the standard cruising yacht, one with a handle sticking out probably isn’t the best choice. Examples of good pressure cookers would include the Fagor Futuro or the Fagor Super Cooker. Both are of a design more like a common stock pot with two handles to the side rather than a single long handle like a common saucepan. This makes these easy to store. The Fagor Super Cooker can even be used for baking, pressure frying and pressure roasting. The advantages of a pressure cooker on a boat are many. Pressure-cooking allows you to cook with less heat in a quicker period of time. You simply bring the cooker up to pressure and turn the burner down to maintain the pressure. Since pressure-cooking happens at a higher temperature than regular stovetop cooking your food is cooked more quickly. And, in rough seas, the locking lid of a pressure cooker can keep food from sloshing out across the sole of the cabin. Being able to prepare hot food in virtually any conditions is a definite advantage. (http://www.helium.com/items/980177-how-to-equip-your-sailboat-galley)
Equipping – Utensils
- For utensils you want to look for good quality plastic, or again, heavy stainless steel. Make sure none of the utensils you purchase have cheaper metal components like soft iron or aluminum. While carbon steel knives sharpen easily and hold an edge for a long time, unless you are fastidious about drying them and storing them away from salt laden moist air, you will spend a considerable amount of time polishing away rust and your knives will wither away relatively quickly compared to good quality stainless. (http://www.helium.com/items/980177-how-to-equip-your-sailboat-galley)
Sink
- Sinks on any bluewater boat, in addition to being close to the centerline as possible, should also be deep to minimize spills, and ideally large enough to contain the largest pot and/or pan onboard. It is best to have two deep sinks side by side, one used for washing and the other rinsing. (The Modern Cruising Sailboat, p. 223)
- Look for insulation around sink bowl to dampen water drip sounds (http://www.homedepot.com/)
- Always expect to pay more for a heavier-gauge sink. Sometimes, the thin, unlined ones are all you need. Sometimes not. Choose based on more than price, in any case. (http://www.plasticclassicforum.com/forum/)
- There were originally two tiny-ish sinks like the one on the right – too small for everyday use and for at sea. We moved one of the tiny sinks outboard and hooked it up to the drain solely as an “enclosed drainer” for clean dishes, and replaced the main one with a ~13″ x 7″ x 9″ deep unit that is available at West Marine (and other places). I don’t see the sink I used now on West’s website (but then I don’t usually have good luck searching their site without their item number), but I believe it is in their catalog still. It’s approximately 13″ x 17″ x 9″ deep (OD of flange). (http://www.plasticclassicforum.com/forum/)
- You may already have tried this, but if you look for “bar sinks” you’ll find smaller sinks and oftentimes ones without the big apron for the faucet holes.I’d love one of the Scandvik sinks with the built-in drainboard, but Gaaaah, the price! I was told once that a quick measure of the quality of a stainless sink is to look at the corner radii. It’s more difficult to make sharper corners, so the sinks that have them are generally higher quality. (http://www.plasticclassicforum.com/forum/)
- Without hesitation, if I ever do a new galley, it’ll be corian with integral sink. (http://www.plasticclassicforum.com/forum/)
- Make sure the bottom of the sink will be higher than your waterline or the sink will not drain (This Old Boat, p. 107)
- After 4 months aboard, I knew that the tiny double sink aboard Que Tal wasn’t working — I couldn’t even fit a plate in it on edge diagonally. We tore it out and had a single-bowl sink made to fit in the same opening. A day’s work and $100 made a HUGE difference in how I felt about working in the galley. (http://theboatgalley.com/boat-cooking/)
- The sink must be deep enough so that it won’t spill even with half load of dishwater. A depth of 8 – 10” will do. Many cooks like to have two sinks – one for washing dishes, the other for rinsing them. (Desirable and Undesirable Characteristics of Offshore Yachts, p. 133)
- Must be near the boat’s centerline to enable them to drain on either tack. A small double sink will function much better than a large single, because the baffle will keep water from gaining splashy momentum. You also have one extra sink in which to drip dry dishes…greater the depth, less chance of spillage. Do not place the bottom of the sink lower than the water-line, for you will then have to have a bilge pump to pump it out. (From a Bare Hull, p. 36)
- The galley sink should be deep, and if possible, a double model. With two sink compartments, dishes can be washed in one and rinsed in the other. They should be wide and deep enough, say 10”, so that a dish can be passed beneath the spigot – a high one helps.
- What is needed is something deep (i” is about right) and just large enough to take a dinner plate or a good-sized saucepan. This minimizes both water consumption and spills. (Cruising Handbook, p. 137)
- Dishwashing is greatly simplified with two sinks – one for washing and one for rinsinging and/or draining. The sink needs to be close to the centerline to ensure that they are above the waterline and drain properly at any angle of heel. Sinks mounted off the centerline, especially those on the hull side, almost always ned up below the waterline and flood when well heeled on one tack. To prevent this, either the seacock must be closed at sea – putting the sinks out of commission – or a daphragm-tpe pump must be added to the discharge. Alternatively, the sinks can be drained to a gray-water tank. All three approaches have undeisreable complications: it is must better to situation the sinks where they can’t flood. (Cruising Handbook, p. 138)
- Ideally, the sinks are installed below the Corian countertop rather than over the top of it. There is no lip around the sinks, which makes it much easier to clean up the surrounding area. A sealed fiddle rail should be located between the sink area and the rest of the countertop to keep dishwashing water from migrating to other parts of the galley. (Cruising Handbook, p. 138)
- Dishware and cutlery stowage should be readily accessible and within easy reach of the sink. The ideal arrangement is a plate rack suspended over the sinks; wet dishes can drip-dry into the sinks, elminating the need for towel-drying. However, the rack must be designed so it’s not a head-banger on either tack.
- …make sure the bottom of the sink will be higher than your waterline or the sink will not drain. (This Old Boat, p. 107)
- Drains should not incproate U-traps (except when a graywater tank is used), because they cause nasty smells, but they should contain a couple of bends before connecting to a through-hull. if this is not done, when the boat is pounding into head seas, salt water may be drain up the drainpipe, spraying out of the sink drains. (Cruising Handbook, p. 138)
- The drains need traps since sink waste is likely to give off unpleasant odors (Desirable and Undesirable Characteristics of Offshore Yachts, p. 133)
- The bottom of the sink is probably not far above the waterline at all, and yes, when I heel the sink can fill. I just closed the thru hull and have not opened it, since I rarely use the sink. (http://www.sailnet.com/forums/gear-maintenance/61637-how-does-sink-drain-work.html)
- The faucet should incorporate a tall spout into its design. Galley sinks are small enough without having to deal with a short faucet that doesn’t allow you to get a good-sized pot under it. A single lever control for hot and cold water is also desirable. One lever allows you to obtain the right water temperature mix quicker and with less wasted water than by turning two separate taps. And since it’s controlled by just one hand, you’re always able to hold on while heeled. We added a spray nozzle on a hose (like on a normal kitchen sink) that is great for rinsing, and especially good for washing your hair when you don’t want to have a full shower. A flush-mounted soap dispenser for dishwashing detergent is a timesaving, clutter-reducing addition. (http://www.sailnet.com/forums/gear-maintenance-articles/19734-renovating-galley.html)
- We have two foot pumps / two faucets into our galley. One is sea water, the other is fresh water. (http://www.cruisersforum.com/forums/f91/using-sea-water-in-the-galley-35700-2.html)
- Using foot, hand, or pressure pumps, water can be readily accessible both from the boat’s tanks and from the sea or lake. (Desirable and Undesirable Characteristics of Offshore Yachts, p. 133)
- Many boats incorporate a manual saltwater supply in the galley…Sooner or later, the salt corrodes the sinks and associated fittings (for this reason, chrome-plated, plastic drain fittings are preferably to stainless steel). With adequate tankage…and proper water management, I see no great need for salt water in the galley – we omitted it in our newest boat and haven’t missed it. (Cruising Handbook, p. 138)
Stove
- If you want to cook anything while sailing, you need a properly mounted gimballed stove. Ideally, it should be gimballed in all four directions, but this is very rare. At a minimum, on a monohull it should be mounted and gimballed athwartships to compensate for heeling and rolling. There should be enough swinging room so that the stove, when loaded with pots and pans, can pivot freely without being brought up short. The stove should have rails and potholders and it is best if the cook can tend it without standing directly in front of it. (The Modern Cruising Sailboat, p. 265)
- There should be clearance over the stove top to accommodate the largest pot on boat when the stove is pitched at its maximum heal angle. The cook should also be able to comfortably tend the stove, well braced on either tack, without standing directly in front of it. This minimizes the odds of the cook being injured if hot and/or heavy objects suddenly go flying off the stove. (The Modern Cruising Sailboat, p. 223)
- In the ideal galley there should be enough room for the cook to stand to one side of the stove. That way, if the pot is thrown off the stove, it will hopefully miss the cook.
- Don’t forget the charcoal stove on the rail. It’s probably the most used. (http://www.cruisersforum.com/forums/f91/stoves-37322.html)
- Always assume the boat is going to move erratically and use stove gimbals, pot restraints and the like no matter what the conditions are. Even in a calm anchorage, a fishing boat can come flying by and put up a big wake. (http://theboatgalley.com/boat-cooking/)
- Metal should also be used to protect cabinetry above and behind the stove; even at some distance from the burners and over, surfaces get very hot. (Desirable and Undesirable Characteristics of Offshore Yachts, p. 133)
- There are many stoves on the market…look for the following features: stainless-stell construction…sturdy gimbals positioned for good dynamic balance when the boat is rolling or sailing at severe angles of heel. (Desirable and Undesirable Characteristics of Offshore Yachts, p. 134)
- Beware of placing the stove too far amidships with deep cupboard space behind it. Few things are worse than a badly scorched armpit. (From a Bare Hull, p. 36)
- A better solution for this boat turned out to be installing a Sea Swing stove with a kerosene burner for use underway. The two mounting bases let me stow the stove in an out-of-the-way place when not in use….It would be nice to have a…stove/oven, but on the Triton this would necessitate shortening one of the bunks and reducing seating space. With pressure cookers and stove-top ovens, stove burners can do most of the things of a conventional oven. (Upgrading the Cruising Sailboat, p. 73)
- The stove is an important as any other element of the galley, and selection of fuel type no less so. The first decision is whether to have stove top burners or a stove/oven combination. With pressure cookers and hayboxes, turkeys and roats can be satisfactorily cooked on a stove top, but the end result is a little less certain. Fresh bread, a tough product to come by at sea or in secluded anchorages, is most easily baked in an oven. So, if there’s space in your galley, give extra thought to an oven. (Upgrading the Cruising Sailboat, p. 229)
- Generally, stoves are on the hull side, which makes them difficult yo use when the boat is well heeled….A good case can be made for placing the stove against an athwartships bulkhead; it is easier to maintain footing in front of the stove, and any sudden lurches throw the cook to one side or the other, but not into the stove. (Cruising Handbook, p. 136)
- Any stove, especially in the tropics, needs a vent, fan or opening hatch directly above it to remove unwanted heat from the boat. To act as an extractor when anchored out, a hatch should open on its forward rather than aft edge. (Cruising Handbook, p. 134)
- National Fire Protection Association, Inc. Pleasure Craft Safety Standards – 6-3 Alcohol, Fuel Oil, and Kerosene Stoves (Upgrading the Cruising Sailboat, p.319, 322)
- 6-3.1 – Both pressure or gravity fed burners shall be permitted
- 6-3.2 Fuel supply tanks shall be constructed of corrosion resistant metal with welded or brazed jointsa nd fittings
- 6-3.2.1 Pressure tanks integrally installed with stoves shall withstand a test pressure of at least 200 psig. They shall be effectively protected from the heat of burners
- 6-3.2.2 Pressure tanks for remote installation shall be approved and shall be able to withstand a test pressure of at least 100 psig. They shall be rigidly secured in an accessible location permitting convenient filling and pump operation.
- 6-3.2.3 Gravity tanks shall be substantially secured. They shall be be rigidly secured in an accessible location permitting convenient filling and pump operation.
- 6-3.2.4 No gravity tank shall have a capacity exceeding 2 gallons. Tanks of larger capacity shall meet the requirement of section 5.3 (not referenced)
- 6-3.3 If fuel tanks are remotely located, as is preferred for gravity feed systems, approved stop valves shall be installed close to tanks and fuel lines shall be instaleld with as few fittings as practicable between valves and stove connections.
- 6-5.2.1 Cabin heating equipment shall comply with applicable provisions of Sections 6-1, 6-2, 6-3 and 6-4
- 6-5.2.2 Burners and burner feed arrangements shall be such that safe operation is not affected by motion of the boat
- 6-5.2.3 Heaters shall be rigidly secured.
Links and Resources
Comment Form