Climate
Image Gallery


Project Logs
June 17, 2011
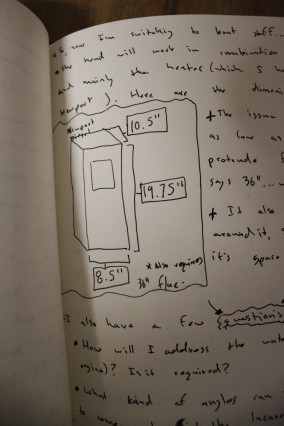
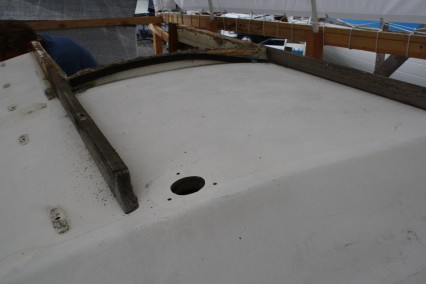
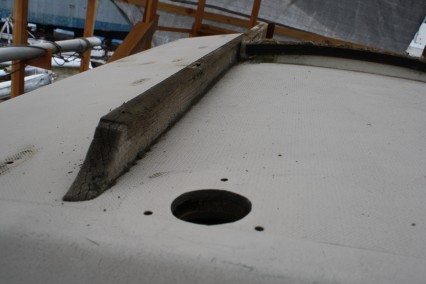
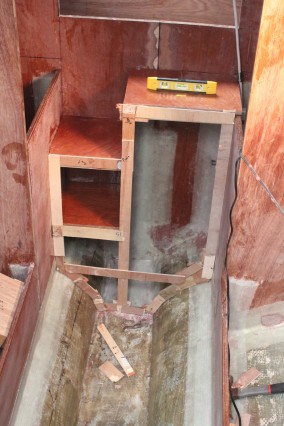
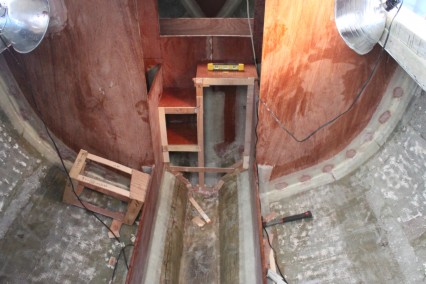
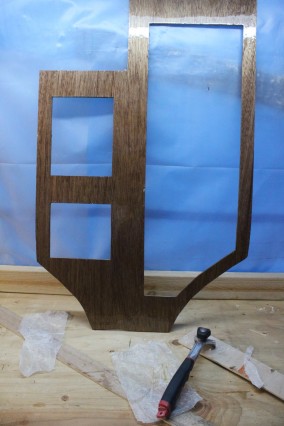
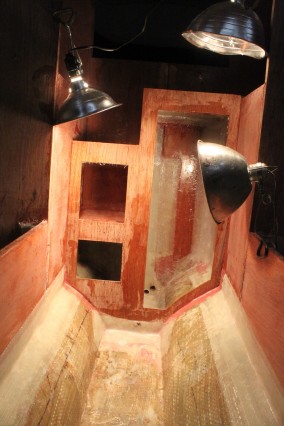
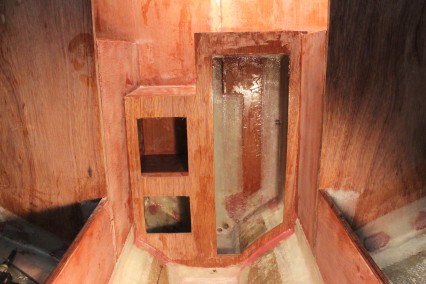
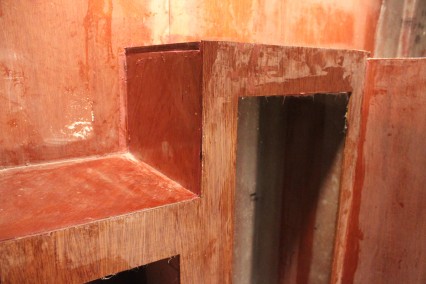
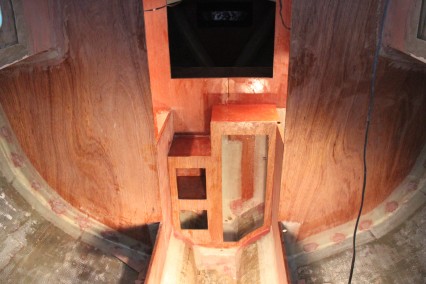
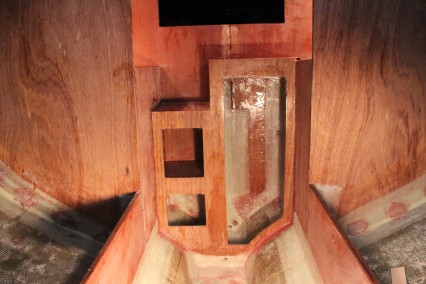
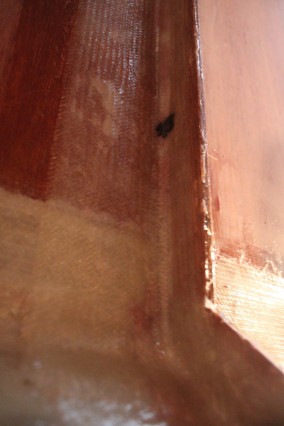
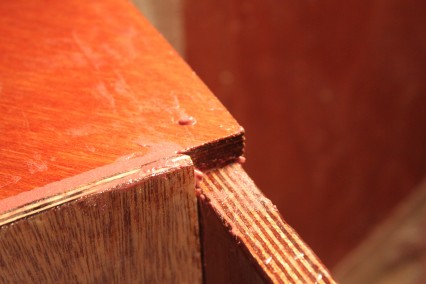
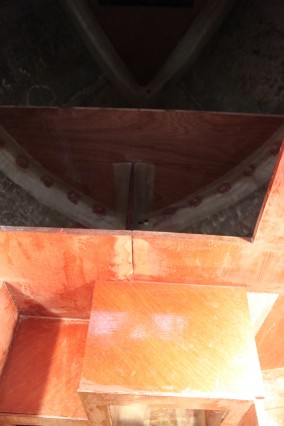
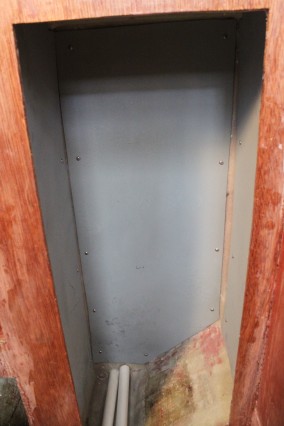
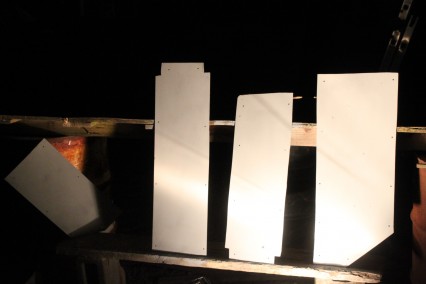
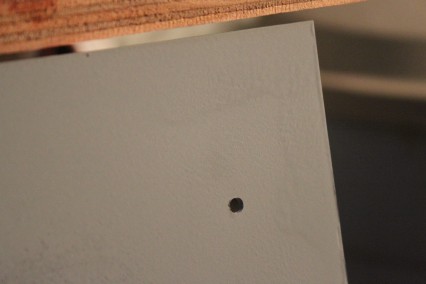
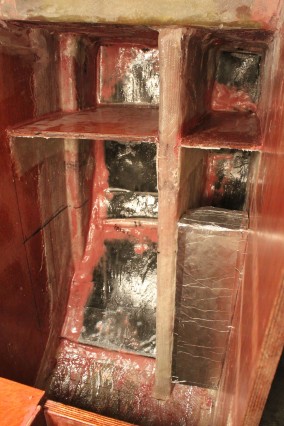
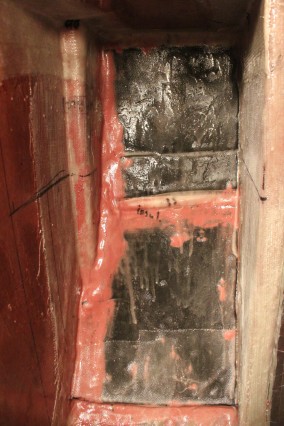
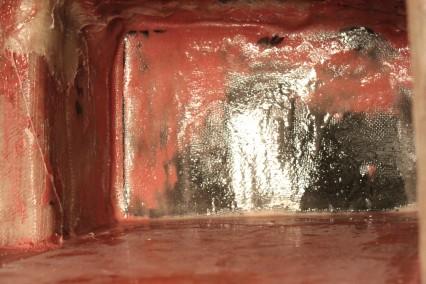
I’ve completed the major construction for the heater “box” (as I’m calling it). I’ve installed metal reflectors on the interior of the box as well as on the icebox bulkhead so that the icebox has some reflective heat protection (besides the foiled insulation). The heater box, once complete, will have a hole drilled out of the top to allow the flu to exit through the cabin-top and will also have a number of holes drilled in the box top so that heat can escape from the box when the heater is in use.
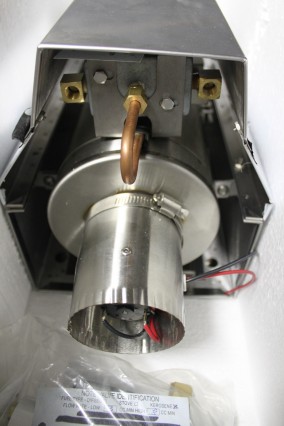
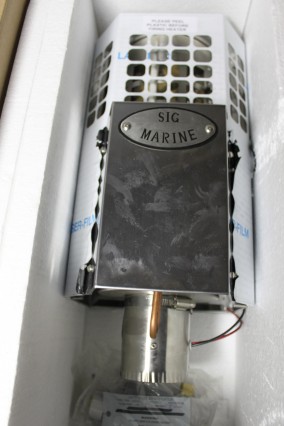
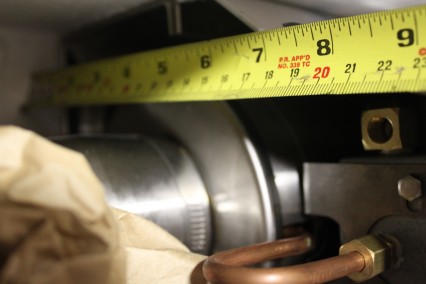
At this point, I’m going to need to order the heater itself prior to doing any further construction. Once I have the heater, I’m going to install mounting fasteners, then install terracotta tile all around the heater box using an epoxy grout. I think the color of the tile will go well with the bulkheads and will be nice to have a material besides wood and fiberglass in the boat.
May 24th, 2011
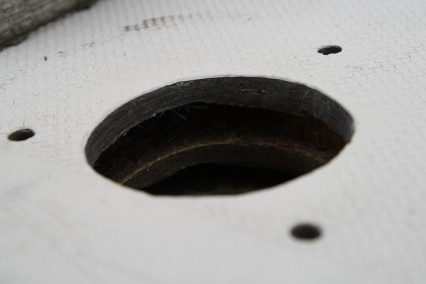
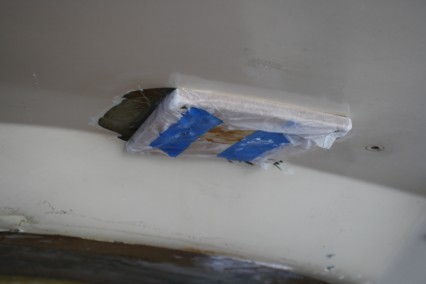
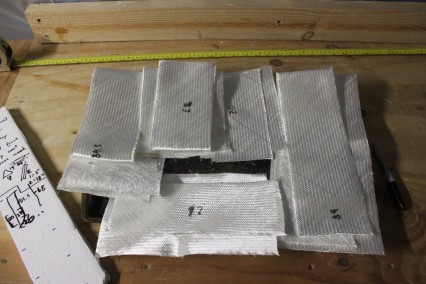
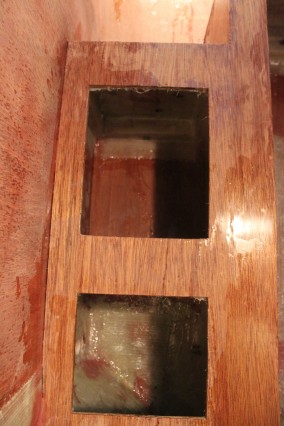
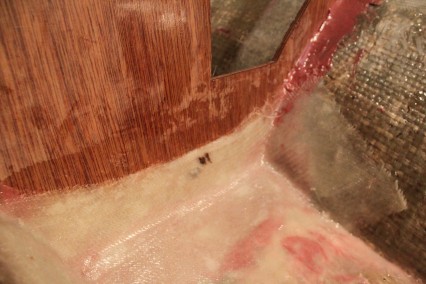
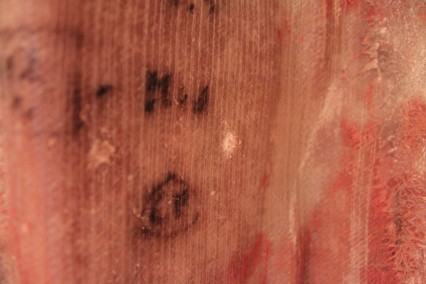
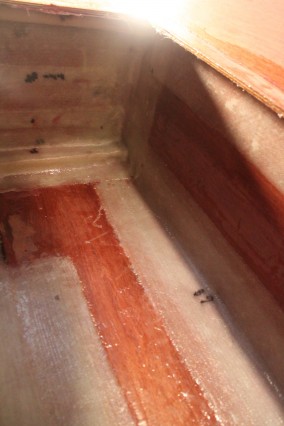
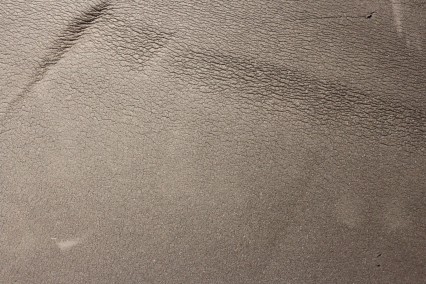
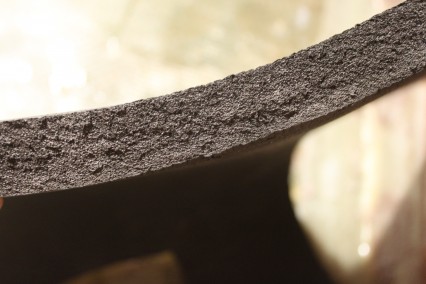
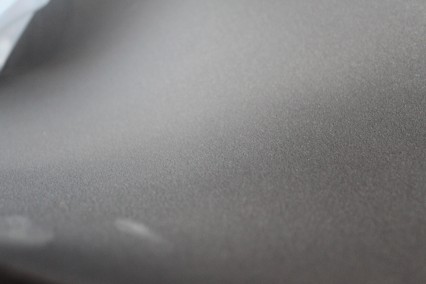
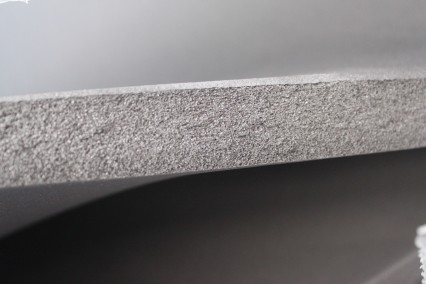
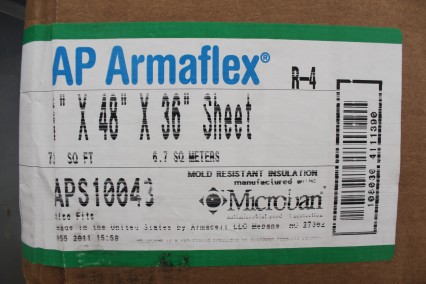
I’ve purchased insulation and have just installed the first insulation into the lockers behind the icebox. So far my decision to glass in the insulation seems to work well, though I’ve found that I needed at least 2 layers of 5.7 oz. cloth in order to protect the insulation more fully.
September 24th, 2011
After installing insulation in the head and icebox areas, my new layup schedule for protecting the insulation is as follows:
- Baltek
- 2 Layers of 7 oz cloth
This layup schedule works well for smaller areas (say – 2′ x 2′ areas), but if the areas were much larger, the middle of the insulation may be a bit “spongy”, so I would suggest adding another layer of Baltek in the middle.
Research
Condensation
- Steel boats are usually only insulated above the waterline to control condensation. (http://www.boatdesign.net/forums/fiberglass-composite-boat-building/insulating-fiberglass-hull-24722.html)
- Condensation is a big problem, but it can be overcome. It is a case of having an air gap between the hul and the insulation so as air movment can be provided. Stay away from spray on foams and insulation products being glued to the hull. If possible, provide a “false” wall of timber between the hull and insulation and stick the isulation to that. Simple light weight ply is sufficient. ensure you have air movement from bottom to top behind the panel. Any condesation can run down to the bilge and evaporation can carry moisture up. (http://www.cruisersforum.com/forums/f55/hull-insulation-4332.html)
- And if that insulation was used against the hull, I’d be sure you’d get condensation in it, to be followed by toxins. I’d rather use a closed-cell material fully bonded to the hull (with adhesive) or a spray-on urethane which, again, is closed cell and bonds itself to the hull. Yes, that makes it impossible to access the hull directly without ripping off insulation. But how else can you ensure you won’t be growing molds in it, unless you leave out the insulation and use traditional open slats, etc. for ventilation? (http://www.cruisersforum.com/forums/f55/hull-insulation-4332.html)
- Between insulation and interior joinery yes, you need airflow. (http://www.cruisersforum.com/forums/f55/hull-insulation-4332.html)
- I would favour leaving a small gap between the insulation and the hull so that any liquids can drain. (http://www.cruisersforum.com/forums/f55/hull-insulation-4332.html)
- Condensation takes place when high humidity comes in contact with a colder surface. If the foam is neutral in temperature, there should be no or very little condensation. (http://www.boatdesign.net/forums/fiberglass-composite-boat-building/insulating-fiberglass-hull-24722.html)
- Condensation is simply the physical manifestation of air cooling down. As air cools, it loses it’s ability to hold moisture, so that moisture will get deposited on whatever cool surface is nearest – in the case of a boat, that’s usually the hull (especially if it is uninsulated). (http://sailfar.net/forum/index.php?topic=1352.0)
- Condensation is caused by a cold surface coming into contact with air which carries more moisture than can remain in vapor state at the surface temperature. The moisture comes from our breathing process (each person emits about two quarts/liters per day); from cooking (the use of propane as a cooking fuel generates large quantities of moisture – pasta and hot drinks are major contributors); and from bathing. Since all of these activities go on to some degree, what can you do to avoid condensation problems? Step one comes in pre-departure preparation, in the form of insulation. Both fiberglass and metal boats are going to sweat in really cold water. So both require some form of insulation. Our preferred material these days is to use a non-absorbent product like Armaflex. On Wind Horse this is 1/2″ (12.6mm) thick on the hull and 1/4″ (4.3mm) on the framing members. Below the waterline, in 41F (5C) water we do not sweat. At the colder temperatures there is just a hint of moisture. This same material would work well for fiberglass hulls.This insulation covers tank tops, hull sides, and deck. Cabin soles are cored with one inch (24mm) structural foam, providing a second layer of insulation.Some boats use sprayed foam, or fiberglass insulation, both of which are less costly to install, but not as long lived as the Armaflex in humid environments. (http://setsail.com/s_logs-dashew-dashew520/#more-2303)
- learned to open the ports at night to let in the cold dry air, and the pasta was drained in the head with a hatch open to keep the humidity down in the cabin…if it is cold enough, then mold and mildew are not going to grow. (http://setsail.com/s_logs-dashew-dashew520/#more-2303)
- There are two ways to prevent condensation on a surface. (1) Raise the temperature of the surface above the dew point of the air or (2) Reduce the dew point of the air below the temperature of the surface. (http://www.trawlersandtrawlering.com/howto/captnwil.html)
- Condensation occurs on surfaces colder than the air’s dew point…the solution is to make sure that the cabin is properly ventilated with baffled vents and louvered slats in the companionway. (Desirable and Undesirable Characteristics of Offshore Yachts, p. 153 – 4)
Heater
- Heat produced by electricity is a dry heat, unlike heat produced by propane, alcohol, or kerosene. Liquid fuels release water vapor that can contribute to the mold and the this-doesn’t-quite-feel-dry factor. (http://www.sailnet.com/forums/her-sailnet-articles/21016-wintering-aboard.html)
- We mounted the stove as low as possible to ensure warmth at foot level. (After 50,000 Miles, p. 129)
- Volume is the cubic feet of space to be heated…to heat those areas [forward cabin], while not as important, almost doubles the BTUs. Convection or radiant-type heaters won’t circulate air efficiently from one cabin to the next… (Upgrading the Cruising Sailboat, p. 284)
- (For the information about BTU’s required to cool cabins (which closely relates to how to heat cabins as well) please refer to Upgrading the Cruising Sailboat, Fig. 14-1, p. 284)
- A small 12V cabin fan helps circulate warm air throughout the boat. Most solid and less expensive liquid fuel heaters do not have fans to push air around, and this limits heating to the immediate area. If the heater doesn’t have an internal fan, an external fan can be used for cooling in summer as well.
- Condensation is exacerbated by the use of propane-, alchohol-, and diesel-fueled galley stoves and unvented (i.e., without chimneys) because they put at least a gallon of moisture into the air for every gallon of fuel burned. Condensation can be minimized by good ventilation and the use of “dry” sources of heat (primarily, heaters with vented combustion chambers) (Cruising Handbook, p. 123)
- Wood Stove Discussion – Anyone have an opinion on the best type of deck iron for a wood stove application?…need to come to a decision on the through-cabin top fitting. I have seen the simple, aluminium deck irons without any “bowl” and the more traditional bronze bowl shaped deck iron that is supposed to catch water to help dissipate the heat….I have been advised about the 1″ space in the cabin top exit….a simple air space arrangement with out flange to keep it from leaking…or more like deck ss sheat metal – It’s about a 3″ high thing – 3″ diameter hole to receive chimney pipe and it’s cone shape such that the base of the cone is about 5″ diameter and has another inch or so of flat flange to cover some more deck. From the inside, there should be a trim flange of ss and I lined the hole in the deck (5″d) with ss but I doubt that’s needed. So, lots of air space and the above deck cone gives a place for cooler air to form and descend past the hole in the deck….One more suggestion – put some sheet stainless, with a cut out for the flue in it, backed by some “not asbestos but you know what I mean board” under the deck, above the stove. Otherwise the deckhead discolors and any seams in it open and leak because they are getting dried out from below by heat from the stove. This is another very good trick that I was taught…AND…Well, that seems reasonable, though one fellow who has a single burner woodstove felt that the heat was not so great from these stoves and overhead shielding was not necessary. But I’d hate to see the cabin deck go to heck cause of the heat, particularly since it’s canvas covered. From an aesthetic point of view, I am reluctant to cover up more wood than I have to. (http://forum.woodenboat.com/showthread.php?2293-Wood-stove-deck-iron-question)
- A chimney works only if the hot gas inside is sufficiently lighter than the surrounding air to provide suction, which creates an upward draft. However, this will not happen if the surrounding air in the boat’s cabin is itself under suction. When air is being pulled out by the companionway dodger or by cowl vents that have been aimed downwind, the chimney will actually work in reverse and force smoke and fumes into the cabin instead of out of it it….some heaters are equipped with exhaust blowers. However, by adjusting the inlets and closing the outlets in the ventilation system, the crew can usually put the cabin under slight positive pressure and make the chimney work properly. (Desirable and Undesirable Characteristics of Offshore Yachts, p. 155)
- For an image of the flue issue, please see Desirable and Undesirable Characteristics of Offshore Yachts, p. 155)
Insulation
- …it is always more habitable if it is dry inside and the temperature is moderate. Hull insulation is an essential ingredient in achieving both these goals. The interior of an insulated hull heats up and cools of quickly when it gets too hot or cold outside, and whenever it is warmer in the boat than it is outside, condensation forms rapidly. In fiberglass boats with no insulation, it’s not unusual to wake up on a chilly autumn morning in a soggy berth with rivers of condensation pouring off ports, hatches and other metal surfaces. Besides being unpleasant, excess condensation greatly accelerates the growth of mold and mildew aboard. (The Modern Cruising Sailboat, p. 228)
- Insulation is frequently left out, perhaps because it adds weight. Bear in mind that insulation works both ways. It keeps out the heat of summer and the cold of winter, giving the human critter below deck a degree of comfort….Whatever insulating material you use, arrange it in removable panels to provide access to wiring and fastenings. (Desirable and Undesirable Characteristics of Offshore Yachts, p. 113)
- Heating or cooling the cabin is one thing, but keeping it that way is quite another. The answer is insulating the hull. Some of the newer fiberglass boats use Airex or Kegecell foam cores, which in effect adds an insulating layer between the inner and outer layers of fiberglass. Condensation is virtually eliminated, and heat and cold are preserved long after the temperature has changed. (Upgrading the Cruising Sailboat, p. 292)
- Styrofoam is one of the first materials people think of when the subject of insulation arises. There are 3 difficulties with it: 1) it is rigid and does not conform well to the shape of the hull 2) It is brittle and must be covered with some to prevent it from chipping away 3) If it ever burns, toxic fumes are given off.
- Urethane foam works well – 2” of it will turn the hull into a thermos. However it is expensive. The Ethafoam is rated at R-2.5, which is not as good an insulating factor as some other products, but definitely better than none at all. And, it is only ½” thick, so it is not difficult to work with. (Upgrading the Cruising Sailboat, p. 292)
- …used a tinfoil-glad polystyrene product called Texcon Reflecto-Foam with an R factor of 5.9. It is ¾” thick. A major reason for his choice was that the material is radar-reflective. his assumption is that he has turn his entire hull into a radar-reflective surface that ships will easily spot on their radars. (Upgrading the Cruising Sailboat, p. 293)
- Applying any type of insulation assumes that the hull material is properly protected. (ie good paint for steel, epoxy for wood, gel coat for fibreglass etc.) (http://www.cruisersforum.com/forums/f55/hull-insulation-4332.html)
- One-eighth-inch-thick wood veneer is perfect for stiffening, insulating, and sound-deadening a hull and is an attractive way to dress up the interior of a cold-molded, fiberglass, or metal hull. When epoxy-glued directly to the hull sides, it will bend easily to a fairly tight radius, such as is often found on bilge and hull curves in smallboats. (Upgrade Your Small Sailboat for Cruising)
- My thoughts were to to glue marine vinyl with contact cement to panels of Elastomeric insulation such as this from Grainger. This is the stuff that most pipe insulation is made of. These panels would then be glued to the bare fiberglass inside of the hull. This should give almost R4 which is better than nothing. (http://www.boatdesign.net/forums/fiberglass-composite-boat-building/insulating-fiberglass-hull-24722.html)
- Actually, I’ll have foil tight against both the hull and against the inner liner – for max radiant protection in both directions. The bubble wrap will be put in to fully fill the area between the foil layers. I considered the use of some sort of adhesive to hold it in place, but feel that I cannot count on said to hold up over a length of time, so instead I’ll have the insulation hold itself in place with friction (ie; packed in tight). Author is mentioning “reflektix” (http://sailfar.net/forum/index.php?topic=1352.0)
- Various strategies employed by those slip-bound for the winter have ranged from contact-cementing closed-cell foam to bare fiberglass to applying hardware-store-variety insulation via an adhesive or applying a layer of outdoor carpet to the inside of the hull. A roll of temporary insulation, which is a cross between aluminum foil and bubble wrap and is available at large hardware stores, attached to the hull kept our v-berth free of condensation last winter for the first time in years. The success of insulating the side of the hull depends on ensuring that air cannot get beneath the layer of insulation. A product called Dri-Deck has also brought good results when used underneath cushions. Drilling holes into cabinets and lockers is also another way to keep air moving, and keep the mold at bay. (http://www.sailnet.com/forums/her-sailnet-articles/21016-wintering-aboard.html)
- …we glued ¾” of foam insulation over the entire hull side from the cabinsole on up (including inside all lockers) and on the cabintop. We then applied the interior paneling over the foam…For those faced with a “sweaty” boat…the most economical way to deal with the problem is to glue ½” or thicker sheets of flexible closed-cell foam to the hull sides and cabintop. (Cruising Handbook, p. 124)
- Cork sheet has an R value of about 3 per inch. It is sold in 1/4″ thickness which gives you an R of .75, and is pretty cheap at about $0.50 per sq foot. It can be used uncovered in low traffic areas. However, Cork goes moldy over time. (http://forum.ssca.org/phpBB3/viewtopic.php?f=4&t=10261&p=58654&hilit=hull+insulation#p58654)
- Bottom line, so far, no one insulation has proven to be both effective insulation and cost effective to install. I haven’t been impressed with the ‘pink’ foam board, the “yellow’ is much better. and I’ve got reservations about the foil-bubble insulation. If I had to recommend an area to start, is remove the overhead paneling, if applicable and put 1 1/2 inch rigid urthane foam board on the overhead, then reinstall the paneling or replace with the fiberglass paneling. (http://answers.yahoo.com/question/index?qid=20090205192905AA6T6rU)
- If you are retrofitting insulation, the best stuff we have found is Armacell with a self adhesive backing. Good insulatve properties, Mold free, can be easily cut and shapped and squeezed to fit odd spaces. (http://forum.ssca.org/phpBB3/viewtopic.php?f=4&t=10261&p=58654&hilit=hull+insulation#p58654)
- Arma. I agree, the stuff is expensive, but worth the money. (http://www.boatdesign.net/forums/fiberglass-composite-boat-building/insulating-fiberglass-hull-24722.html)
- I’m currently leaning towards 1″ Armaflex which provides an additional R value of ~3.8. It is paintable to a white color via company specific paint. Total cost is looking to be ~$2.00/sq ft. (http://archives.sailboatowners.com/)
- nothing beats the PE (Polyethylene Foam)foams. Although pricey, I won’t use anything else. It doesn’t absorb water, it does not rot or allow algea to grow on it. I have offcuts lying outside in the sun (and ours is harsh) and exposed to the elements for more than 5 years, and it looks like the day I got it. (http://www.boatdesign.net/forums/fiberglass-composite-boat-building/insulating-fiberglass-hull-24722.html)
- Polystyrene foam is another choice. It is of the closed cell variety, it is less expensive, it is not as messy as urethane and it has a better R rating. It is harder to use because the adhesives are slow curing. Volatile adhesives will dissolve the foam. Because of this, it is slower to apply, as clamping is required. It does NOT seal the steel from exposure to air, so the foam must be additionally sealed with plastic sheet and out gassing in fire is also a problem as with urethane. (http://www.boatkb.com/Uwe/Forum.aspx/build/3109/Steel-hull-insulation)
- Used a 1/2″ closed cell rigid foam that could be fiberglassed. Can’t remember what kind it was except it was green and little bit crumbly. Cut the foam to fit all the lockers and glued in place. Glassed a layer of mat over it to protect the foam from the contents of the lockers. (http://hhickman.proboards.com/index.cgi?board=Sail&action=display&thread=290)
- I stick with the urethane foam board glassed over as most effective – I have just installed four fish rooms / freezer storage in a 67m fishing vessel, using injected foam behind marine ply glassed over. And have done several cool rooms and freezer containers for commercial use, including my own. I haven’t found a better way either on cost or effectiveness. (http://answers.yahoo.com/question/index?qid=20090205192905AA6T6rU)
- Our boat, Serengeti, used to be in Alaska and Seattle. It’s insulated with ½”, flexible, closed-cell foam glued against the inside of the hull. This is the most popular way to insulate boats and reduce condensation problems. It’s especially important to cover the areas of living space down to the waterline. Choose closed-cell foam as it provides a higher R-value than other types of foam; in addition, it doesn’t suck up moisture. (http://www.sailnet.com/forums/gear-maintenance-articles/19968-best-hull-insulation.html)
- The Mascoat product doesn’t seem to have much insulating value. The specs given in the technical section suggest an R value of 1.5 per inch. But you will only get a .02 inch thickness for each coat. So the total R value will be very low- about 0.1 for three coats. (http://forum.ssca.org/phpBB3/viewtopic.php?f=4&t=10261&p=58654&hilit=hull+insulation#p58654)
Insulation – Icebox
- The best insulating material that is readily available for boat iceboxes is polyurethane foam. It has extremely low thermal conductivity, is easy to handle, relatively inexpensive, and is not attacked by styrene. (http://www.cncphotoalbum.com/doityourself/icebox/improve_ice_box.htm)
- There are two basic approaches to insulating a new box. You can build the outer shell of the box, including the bottom, line this shell with insulation, and then install a liner. Or you can build the liner, insulate the outside of the liner, and drop it in the outer shell. Usually, the outer shell is insulated, and then the liner is added. The outer shell is built first, including the bottom. As much as possible, the support framing for the box is outside the shell, but hidden by adjacent joiner-work. This is done to minimize the amount of insulation lost by working around internal framework. (http://www.cncphotoalbum.com/doityourself/icebox/improve_ice_box.htm)
- Before installing the insulation in the shell, a vapor barrier should be fitted between the shell and the insulation. Mylar/foil Space Blanket material, available at sporting goods stores, makes a good vapor barrier. It can be taped to the shell with duct tape. Be careful to seal all the joints in the vapor barrier. (http://www.cncphotoalbum.com/doityourself/icebox/improve_ice_box.htm)
- The minimum thickness of insulation on all surfaces is 2″, but if the boat is to be used in the tropics, or fitted with refrigeration, 3″ to 4″ should be used. It is especially important to maximize insulation on surfaces that face unusual heat, such as near the galley stove or engine box. (http://www.cncphotoalbum.com/doityourself/icebox/improve_ice_box.htm)
- All comer joints should be step lapped rather than butted or mitered. If you use 1″ thick panels, the step lap can be created by fitting the side and end panels first, then the bottom panel. The fitting sequence for the next layer is ends, sides, bottom. If a third or fourth layer of insulation if fitted, just repeat the fitting sequence. Do not permanently install the insulation yet. (http://www.cncphotoalbum.com/doityourself/icebox/improve_ice_box.htm)
- Any foam insulation will work, but look for the highest R-value you can get for a given thickness. You want maximum performance while taking the least amount of volume away from the interior. (http://westsystem.com/ss/building-an-efficient-icebox-2/)
- I used polyisocyanurate foam with aluminum foil on both sides. It is 2 lb density foam board, 2″ thick, with an R-value of 14. The foil provides a reflective radiant barrier. (http://westsystem.com/ss/building-an-efficient-icebox-2/)
- Further information on polyisocyanurate insulation (http://www.pima.org/contentpage/ContentPage.aspx?ModuleID=5&SubModuleID=45):
- – Highest R-value per inch of thickness
- Moisture resistant, water repellent panel
- Resistant to solvents used in construction adhesives
- Excellent dimensional stability
- Superior performance in fire tests – polyiso meets the strict standard of both FM Class Approvals 1 UL 1256/ULC S126
- Service temperature range from -75 F (-60 C) to +225 F (+107 C) to reflect Canadian and US material standards
- Long Term R-value (only roof insulation with third party certification)
- Recycled content
- Zero ozone depletion potential
- Virtually no global warming potential
- Beware that polyisocyanurate (aka “superinsulation”) is an open-cell foam, and as such it suffers from significant performance loss once it gets wet. Though I don’t have the hard data in front of me at the moment, I think it’s something on the order of 60% (http://www.cruisersforum.com/)
- The (pink/blue) Polyurethane rigid foam insulation boards are slightly cheaper than the Polyiso’ Sheathing panels, have approximately the same R-Values, but have less compressive strength. In this application, structural integrity shouldn’t be a consideration. (http://www.cruisersforum.com/)
- The two-part polyurethane foams can have about 40% higher R-values, than sheets. Some (BASF Walltite) two-part Polyurethane closed cell spray foams are rated as high as R-7 per inch. (http://www.cruisersforum.com/)
- I chose to use a double layer of 2 inch foil-faced polyisocyanurate rigid insulation for 4 inches of total insulation. I filled in the remaining gaps under and behind the the trap with expanding foam insulation. (http://www.dasein668.com/projects/winter0405/icebox)
- Insulation was fitted in layers of 25mm polyurethane foam (got it cheap as offcuts from a boat builder). My boat is of plywood construction. First layer was ‘astrofoil’ (a roof insulation product – like bubble wrap covered with alfoil on both sides). Then 3 layers of the foam on the bottom and the sides of the box, individually fitted so the corners were staggered. The lid has 2 layers of this foam. This was followed by another layer of ‘astrofoil’ and then lined with 3mm marine ply, epoxied to form a watertight box. (http://forum.woodenboat.com/archive/index.php/t-8938.html)
- For a custom built refrigerators use only the highest rated foam insulation Polyurethane and polyisocyanurate foam board insulation are the best choices and a minimum thickness of six inches is advised. Foam insulation is a relatively minor cost in refrigerator construction. However, more than six inches adds enormous bulk with decreasing energy savings (http://www.boatelectric.com/Nova%20Box_Building_Plan_for_the_LT200-F%20Kit.htm)
- I used two thicknesses of 2″ Homosote, or polyisocyanurate, for a total of 4″ all around, which has a total R value of 28.8 (7.2 per inch). The foam has a foil backing on each side. (http://www.triton381.com/projects/restoration/galleyconstruction2.htm)
- The best insulation between the ambient air and the refrigerated space is a perfect vacuum since it leaves no molecules to transfer heat energy. This is the principle of a vacuum, or Thermos, bottle. But this isn’t practical on a boat’s icebox. The next best insulation is trapped air such as the bubbles you find in foam. The higher the quality of this foam, the thicker it is, and the more uniform it is, the better it will be at keeping heat from creeping into the box. Insulation is rated in R-factors―a value of R-20 is OK for refrigerators and a minimum of R-30 for freezers, but special (read expensive) space-age materials with R-factors as high as 75 per inch of thickness are available. (http://www.sailnet.com/forums/gear-maintenance-articles/19905-refrigeration-part-i.html)
- The curve of energy required to maintain temperature differentials is not linear―it takes nearly four times more energy to maintain an 80-degree temperature differential than one of 40 degrees, which is why most freezers are small. (http://www.sailnet.com/forums/gear-maintenance-articles/19905-refrigeration-part-i.html)
- Used two layers of 2” urethane foam on all faces. Both a vapor-proof and heat-reflective barrier should be incorporated. Mylar and tinfoil can be stuck to the insides of the plywood housing box with resin, but a “space blanket” functions as both. (Upgrading the Cruising Sailboat, p. 69)
- We insulate the walls to inhibit the transfer of heat from outside to inside; thicker insulation lessens the leak. Assume the test box has 2 inches of foam. What if we increase it to 4 inches of the same foam? The measurement for heat conductivity is expressed in terms of a K-factor (which tells us the rate at which heat travels through a substance), with the efficiency of insulation expressed as the reciprocal of the material’s K factor, or the R-value. Foam board normally used to insulate iceboxes is likely to have an R-value between 4 and 6.4 The higher the R-value, the better the insulating properties. As with additional thickness, the effect of a higher R-value is also fractional. Replacing 2 inches of R-4 insulation (total R-value = 8) with 4 inches of R-6 insulation (total R-value = 24) reduces the leak to 1,296 BTU, 8/24 of the original. (This Old Boat, p. 358-9)
- The bigger area of the icebox, the bigger area for heat to pass through. More surface area of the box, more heat leaks through. Heat leak into a closed box relates directly to the box’s total surface area. Cutting interior size by 50%, reduces the outside surface area – smaller boxes are more efficient. (This Old Boat, p. 358-9)
- Polyiso has an R-value of 30% higher than that of XEPS (basically styrofoam). Dow Chemical makes both XEPS with an R-value of 5 and polyiso (Tuff-R) at 6.5. Using polyiso lets you reduce either hte inuslation thickness or the daily Ah load. Polyiso isn’t as moistureproof as XEPS. Presumably, the risk is that a cold box interior can result in condensation, which permeates the insulation which ruins its insulating properties. The author doesn’t agree and believes any possible moisture penetration (due to condensation) will be confined to the initial laminate. Resolves that XEPS is a great product and hard to argue against a waterproof material used on a boat, but XEPS is not readily available while Polyisocyanurate is. Basically thinks that Polyiso is better. Suggests painting edges of Polyiso with epoxy, but not necessary with XEPS. (This Old Boat, p. 378 – 80)
- Suggests that a radiant barrier is easier than filling irregular space between straight box and curved hull and it could be more effective as well as reduces possibility of trapping moisture against the hull. Radiant heat is reflected by the foil, but this only works if there is air space for the heat to be reflected into. Also suggests 6 inches of insulation. (This Old Boat, p. 380)
- The rate of accumulation through 4 inches of polyurethane of 5 lbs of moisture a year (90% relative humidity, 85ºF) is halved if a tightly fitted and sealed box of painted or varnished plywood is fitted around the insulation. This rate of 2.5 lbs/year can be reduced to less than a third of a pound a year by adding a tightly sealed envelope of 6-mil polyethylene (building plastic). Any unsealed warm side opening will increase this rate. (http://www.cruisersforum.com/)
- We recommend extruded polystyrene – such as Dow Blueboard or Owens Insulpink. It is conservatively rated at R-5 per inch and will not absorb moisture so it will maintain its insulation value. Other foams may have higher initial insulation values but may quickly degrade in the wet marine environment. Vacuum panels can achieve much higher insulation values but they are very expensive, fragile and difficult to handle. (http://www.great-water.com/pages/Refrigeration/ice_box_design.htm)
Featured Vendor
+ Bay Insulation – I worked with the folks at Bay Insulation to purchase my Armacell insulation. They were very helpful to answer any questions I had and put in an order for my insulation when I was ready to purchase. They have a number of locations around the country and if you’re interested in purchasing Armacell insulation, visit their website to see if there is a location near you – http://www2.bayindustries.com/bay_ins/locations.phtml
Links and Resources
- Discussion on Diesel Heaters – http://www.cruiserlog.com/forums/index.php?showtopic=11128
- ‘Marine Stove and Heater’ link collection – http://cruisenews.net/db/pagetemplate.php?cat_id=8
Comment Form